
Unreal Cine Cameras Rails and Cranes
Cinematic Tools
In this tutorial we will be looking at some of the Cinematic tools within Unreal 5. Namely the Camera Rig Rail and Camera Rig Crane and how we can add a cinematic camera and adjust its camera options including focal length, aperture and effects.
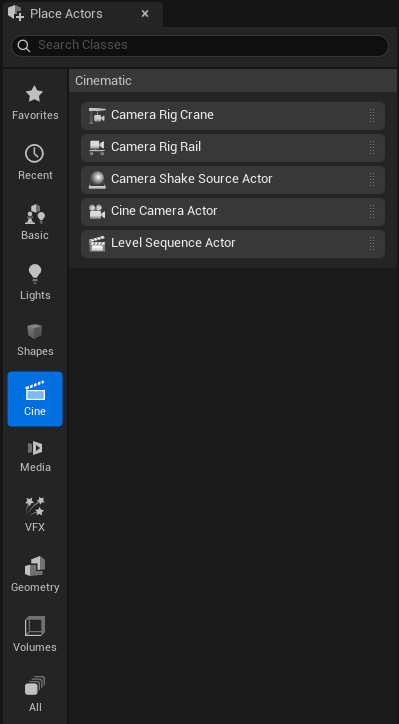
To start with we will need to navigate to the Place Actors Panel (Window > Place Actors Panel)
Camera Rig Rail
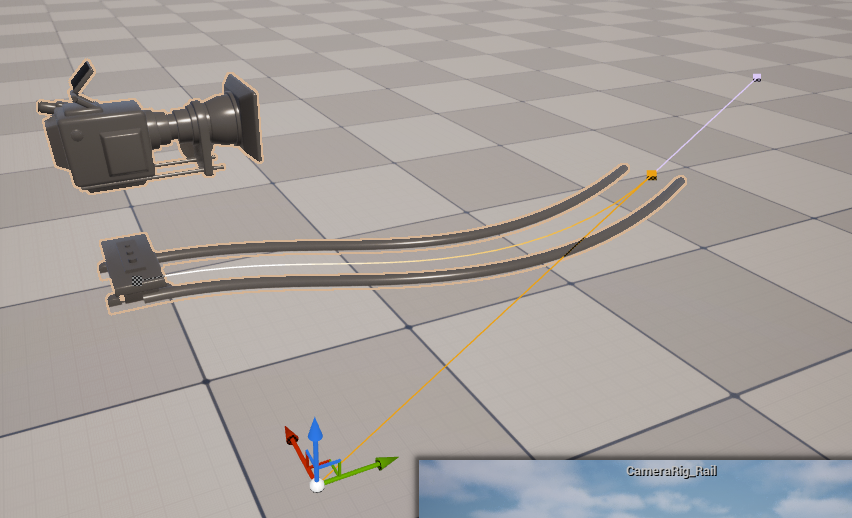
Add Camera Rig Rail by dragging it from the Place Actors Panel or left mouse clicking on the Place Actors dropdown under Cine sub panel.
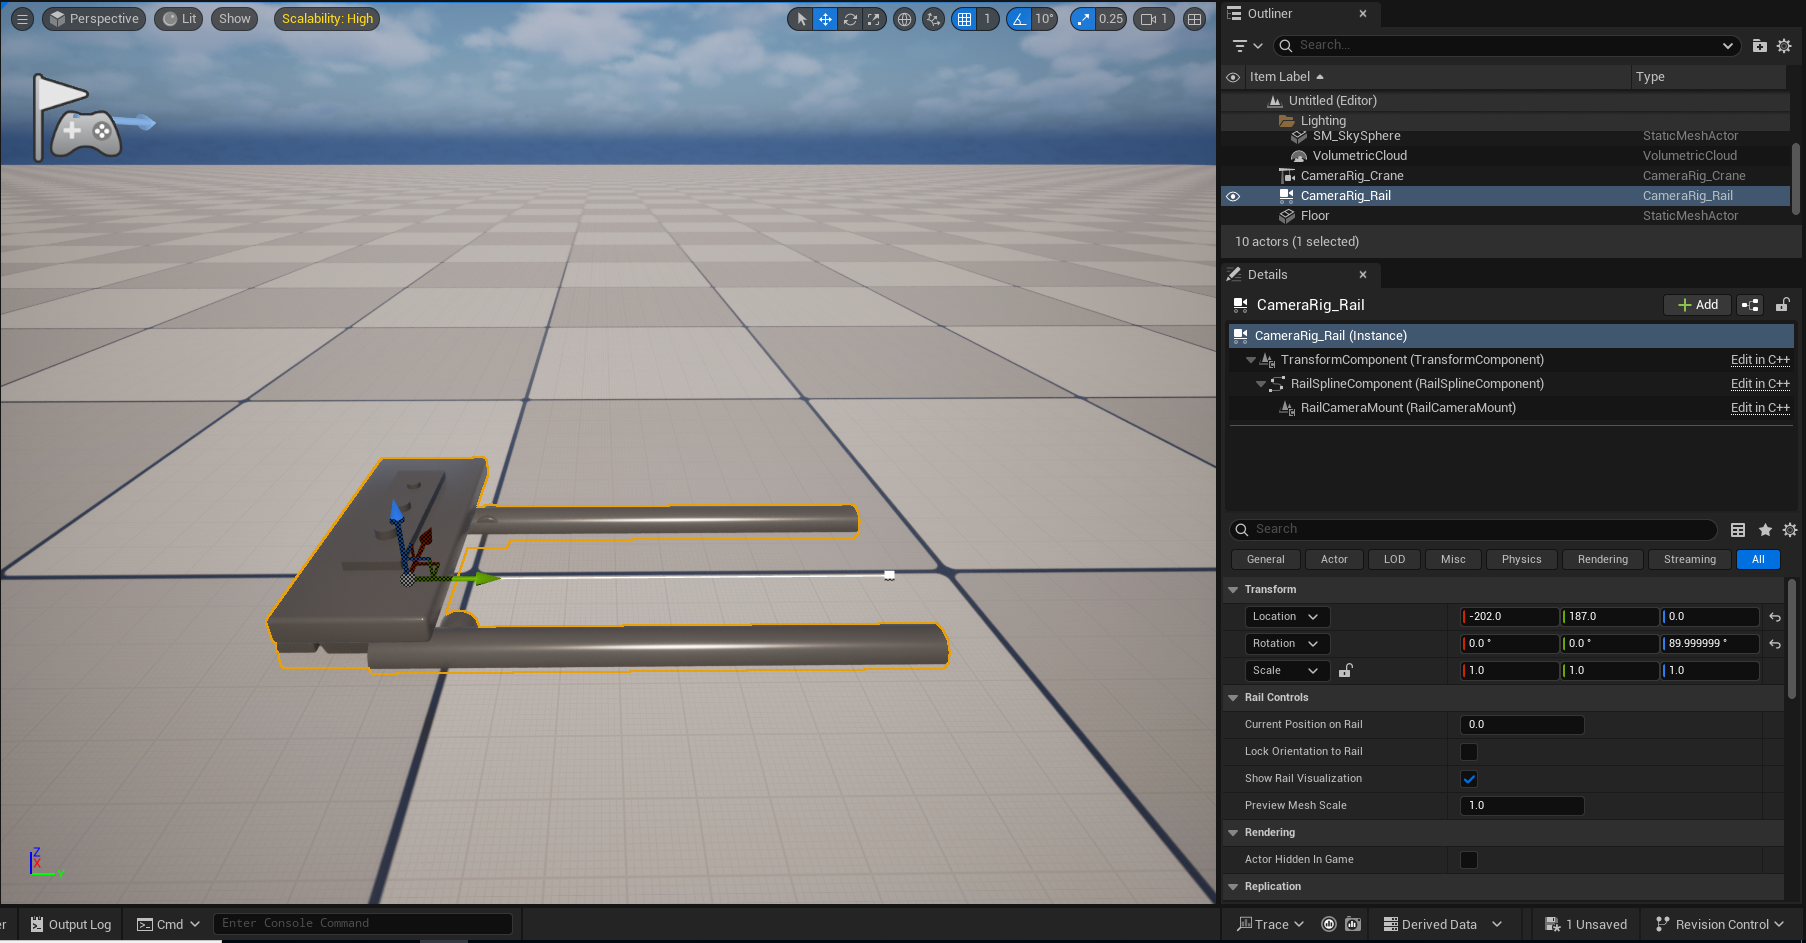
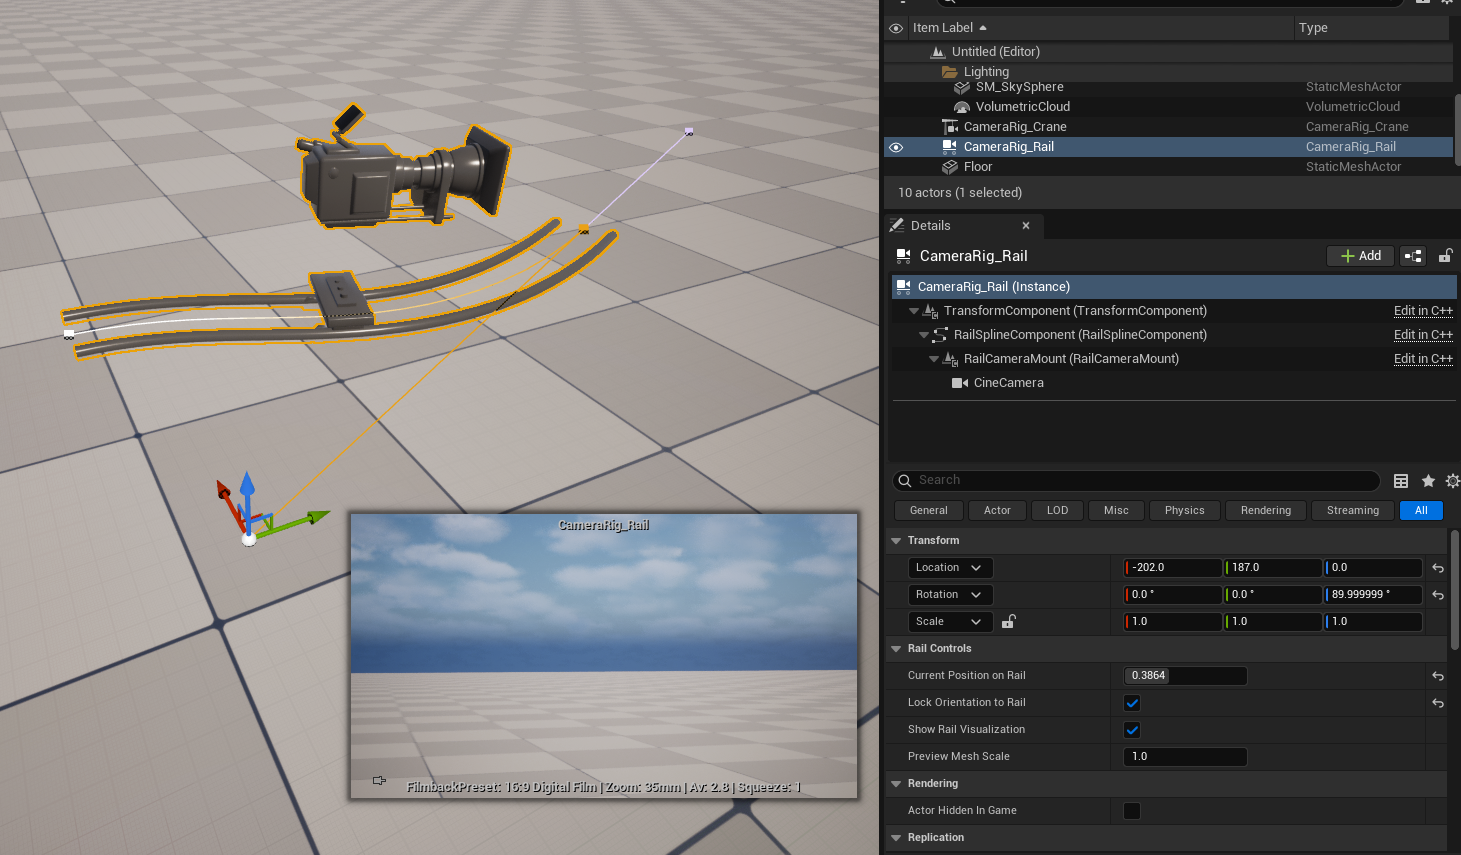
If we look at the details panel for the Camera Rig Rail you will notice it has a variety of options including Current position on rail alongside options to lock orientation. The Camera Rig Rail does not include a Camera element by default.
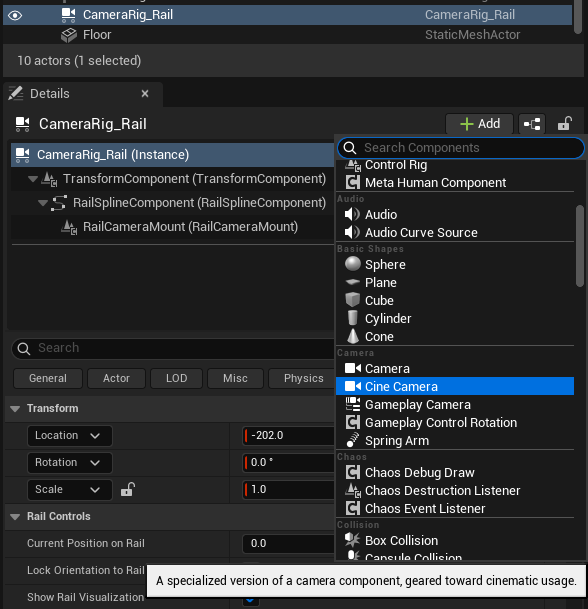
To add a Cine Camera actor to the the Rail actor we will need to parent it to this asset, we will be doing this by clicking on the Camera Rail actor and clicking on the + add button on its details panel and selecting the Cine Camera from the drop down menu.
We need to make sure this is parented to the Rail Camera Mount, we can do this by dragging the Cine camera within the details panel onto the RailCameraMount.

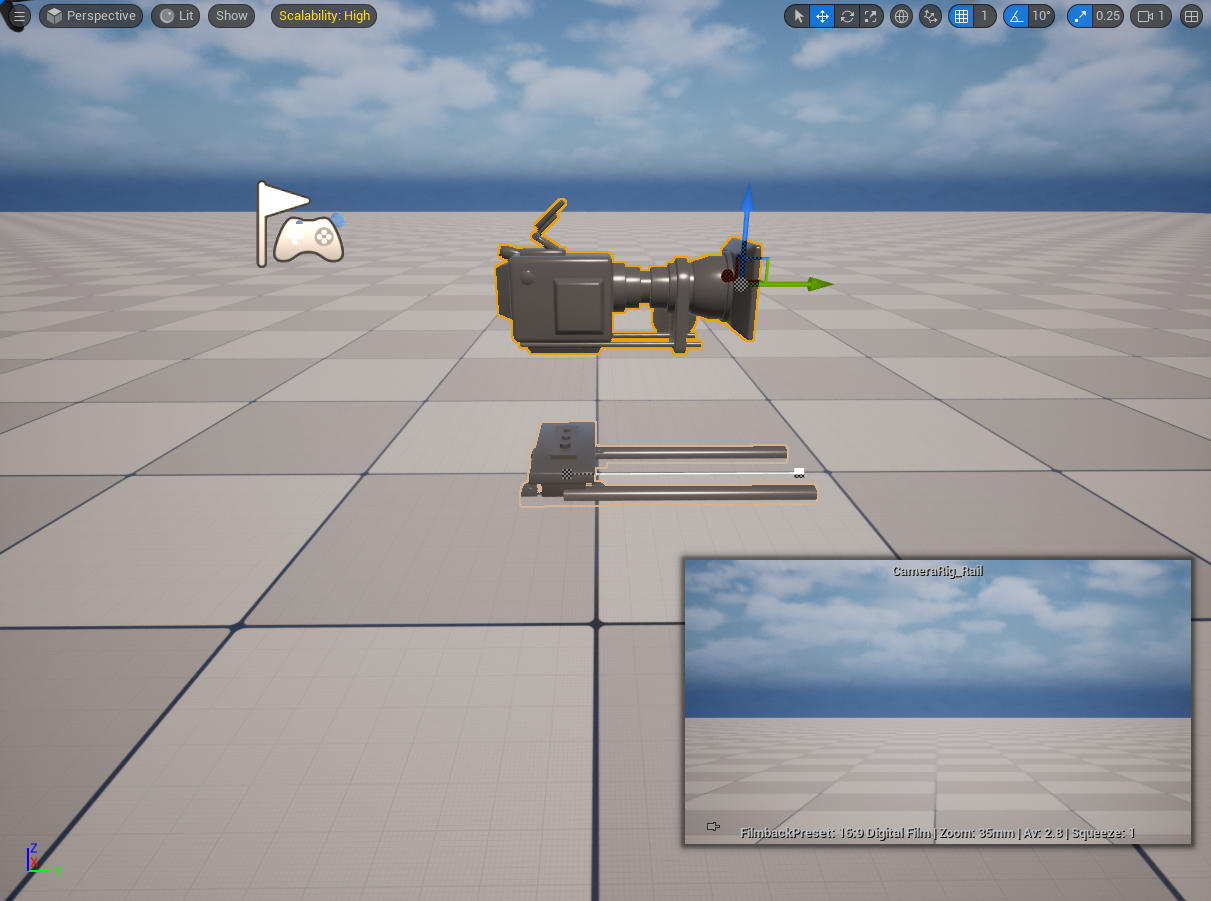
With the CineCamera selected from the Camera Rail details panel we can now adjust the cameras position and rotation using the transform and rotation gizmos within the Editor window.
You will also notice a camera preview window will also appear within the editor, this can be pinned via the small pin icon in the bottom left corner.
We can adjust the length and the rotation of the rail by selecting the small white boxes along the spline of the Camera Rail. Using the transform tools moving these points will change the length of the rail alongside its position in space, we can also add curves by selecting the middle spline point and moving this.
We will cover splines in more detail in later tutorials but splines are essentially paths to which meshes and properties follow and work along.
We can move the camera along this spline / rail using the Current Position on rail value on the CameraRigRail (Instance) of the CameraRig_Rail Asset, we will be key framing this in the sequencer later.
You can also lock the orientation of the camera to that of the rail via Lock Orientation to Rail button.
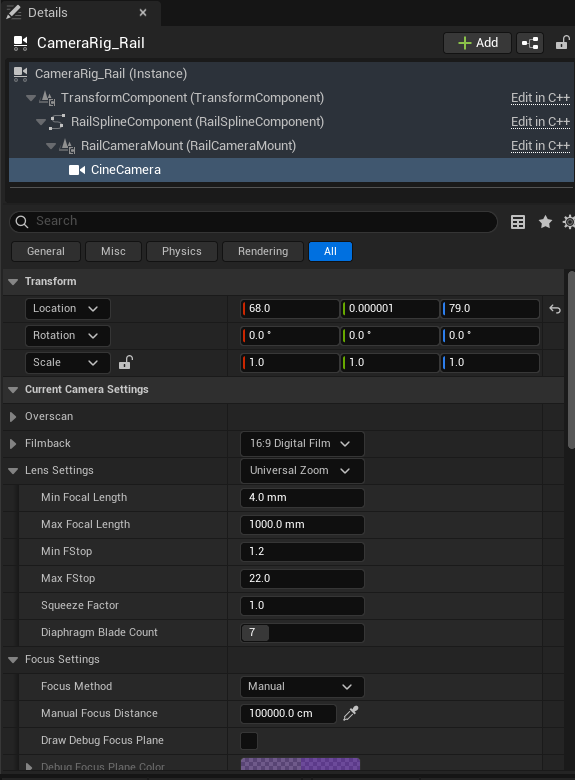
Cine Cameras operate the same as real life cameras and when selected their lens, focus and overall settings can be adjusted in the same way as a DSLR or Cine camera. These can also be keyframed later within the sequencer.
Camera Rig Crane
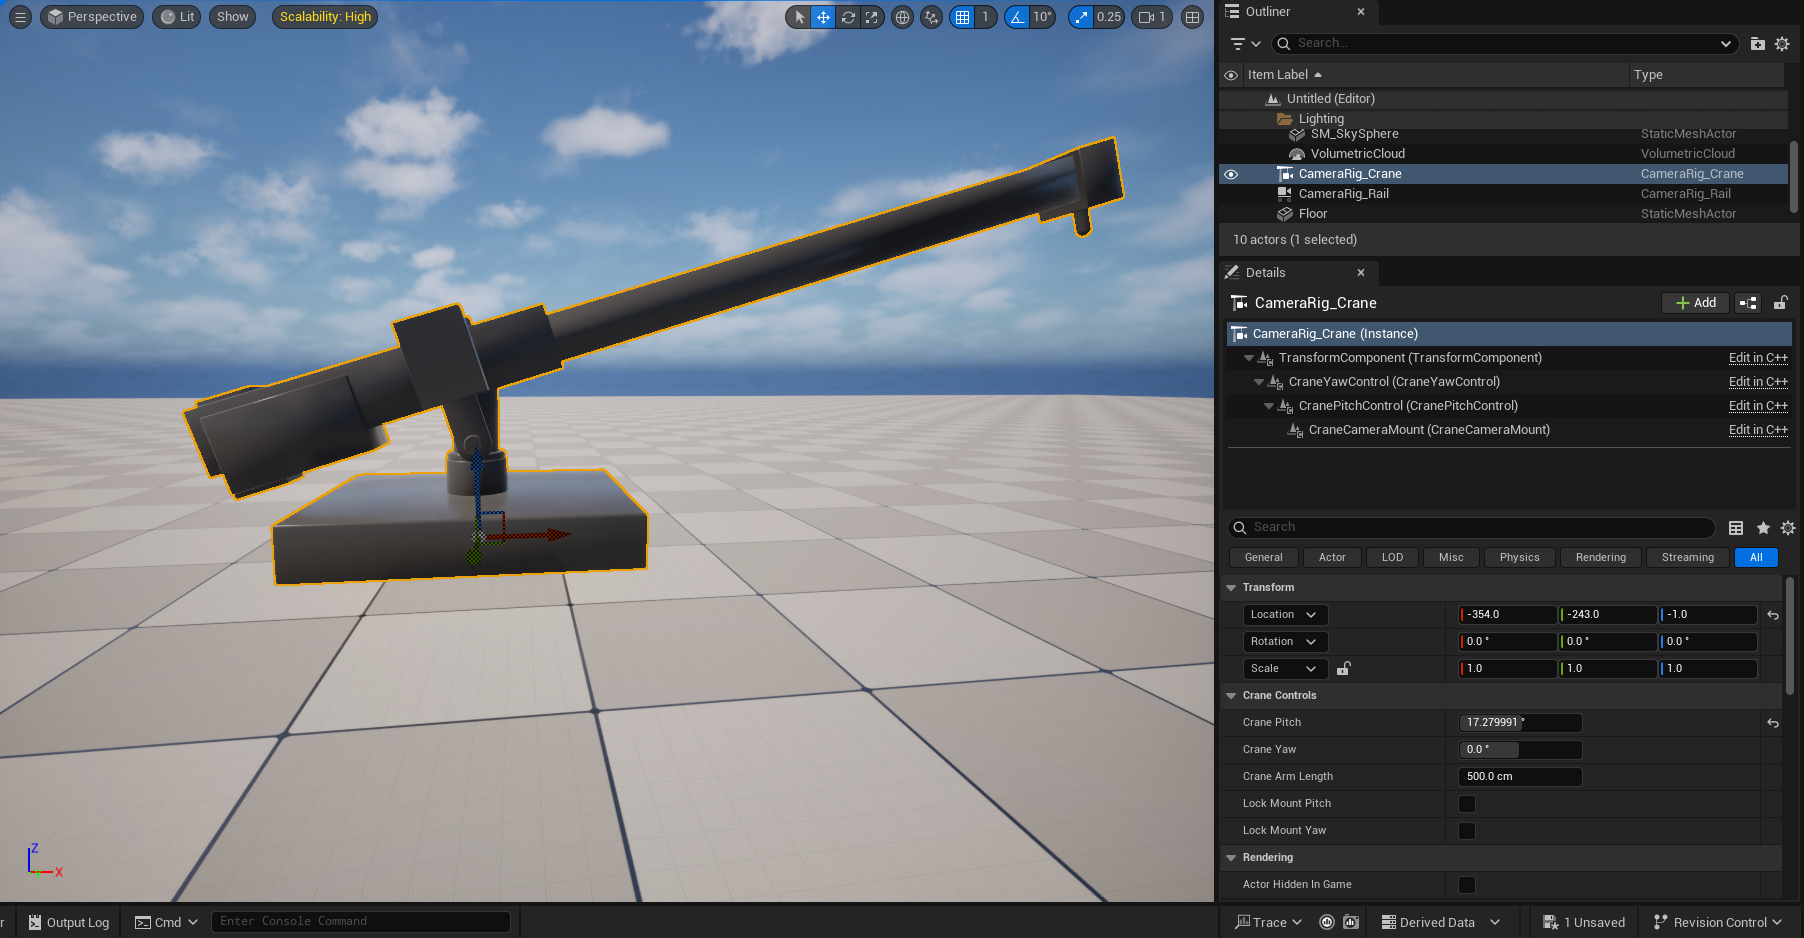
Add Camera Rig Crane by dragging it from the Place Actors Panel or left mouse clicking on the Place Actors dropdown under Cine sub panel.
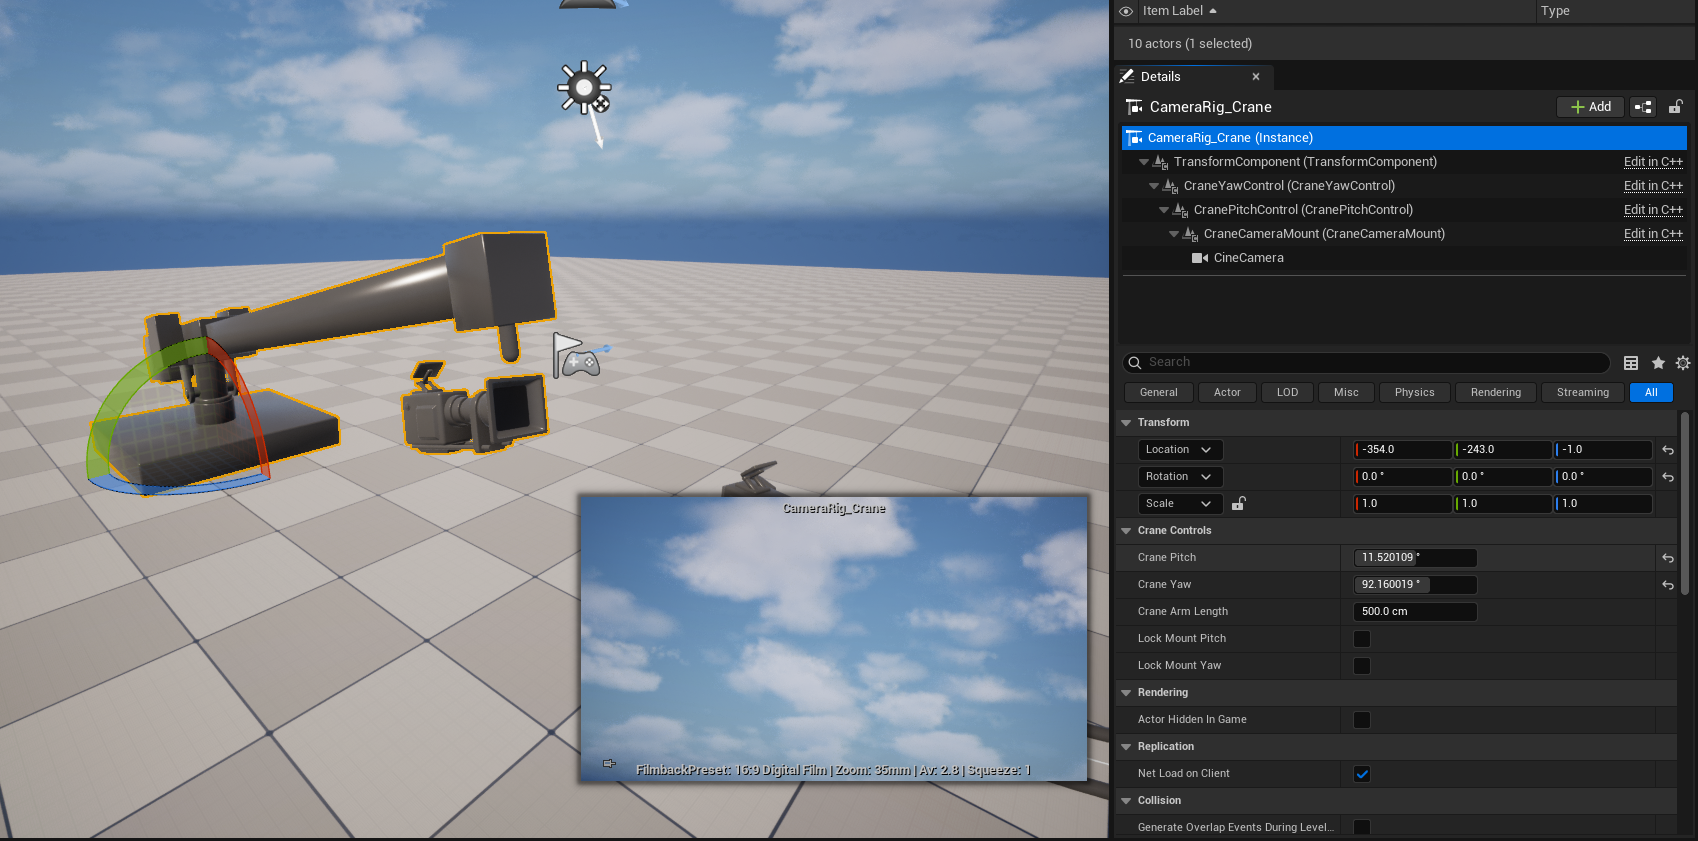
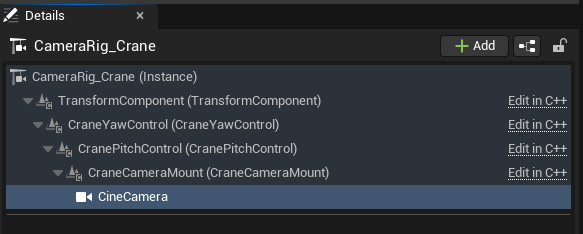
If we look at the details panel for the Camera Rig Crane you will notice it has a variety of options including Crane Pitch, yaw and Arm Length alongside options to lock pitch and yaw. The Camera Rig Crane does not include a Camera element by default.
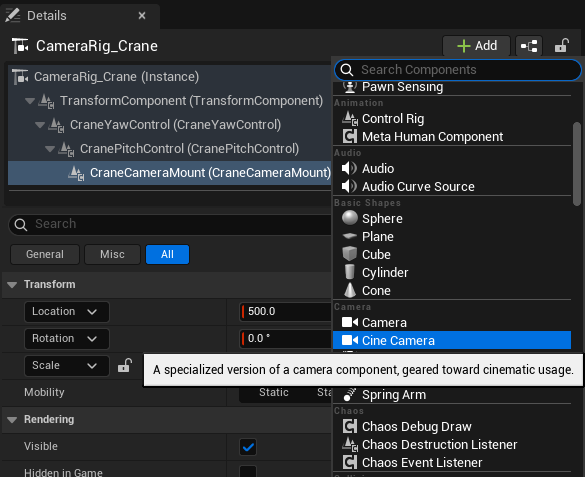
To add a Cine Camera actor to the the Rail actor we will need to parent it to this asset, we will be doing this by clicking on the Camera Rig Crane actor and clicking on the + add button on its details panel and selecting the Cine Camera from the drop down menu.
We need to make sure this is parented to the Crane Camera Mount, we can do this by dragging the Cine camera within the details panel onto the CraneCameraMount.
With the CineCamera selected from the Camera Rail details panel we can now adjust the cameras position and rotation using the transform and rotation gizmos within the Editor window.
You will also notice a camera preview window will also appear within the editor, this can be pinned via the small pin icon in the bottom left corner.
The camera crane allows us to adjust the Arm length, Yaw and Pitch which in turn will move the cameras position and rotation. We adjust these via the details panel for CameraRig_Crane (Instance) .
These will be keyframes in sequencer later. You can also lock the Pitch and Yaw which means the camera itself won’t adjust when these values are change and remain facing in fixed direction or orientation.
Cine Cameras operate the same as real life cameras and when selected their lens, focus and overall settings can be adjusted in the same way as a DSLR or Cine camera. These can also be keyframed later within the sequencer.