
Landscape Tool + Foliage [Natural Landscapes]
Creating a New Level
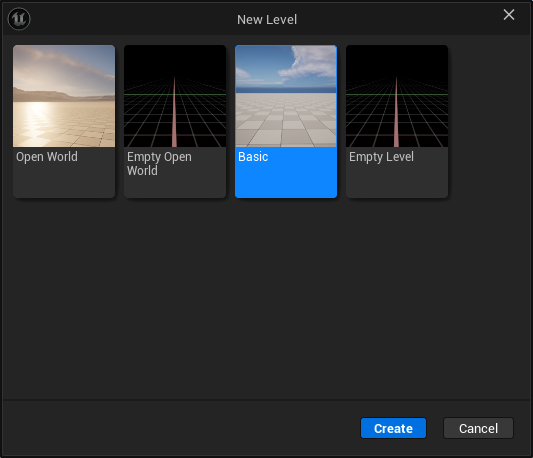
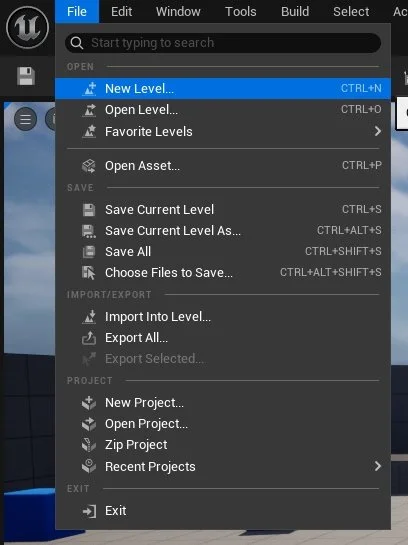
We are going to create a New Level in which to create our landscape within, this can be done via File > New Level or Ctrl + N.
Once this is done we can save this new level using an appropriate name for that Level.
We are going to select the Basic Level template
Landscape Mode
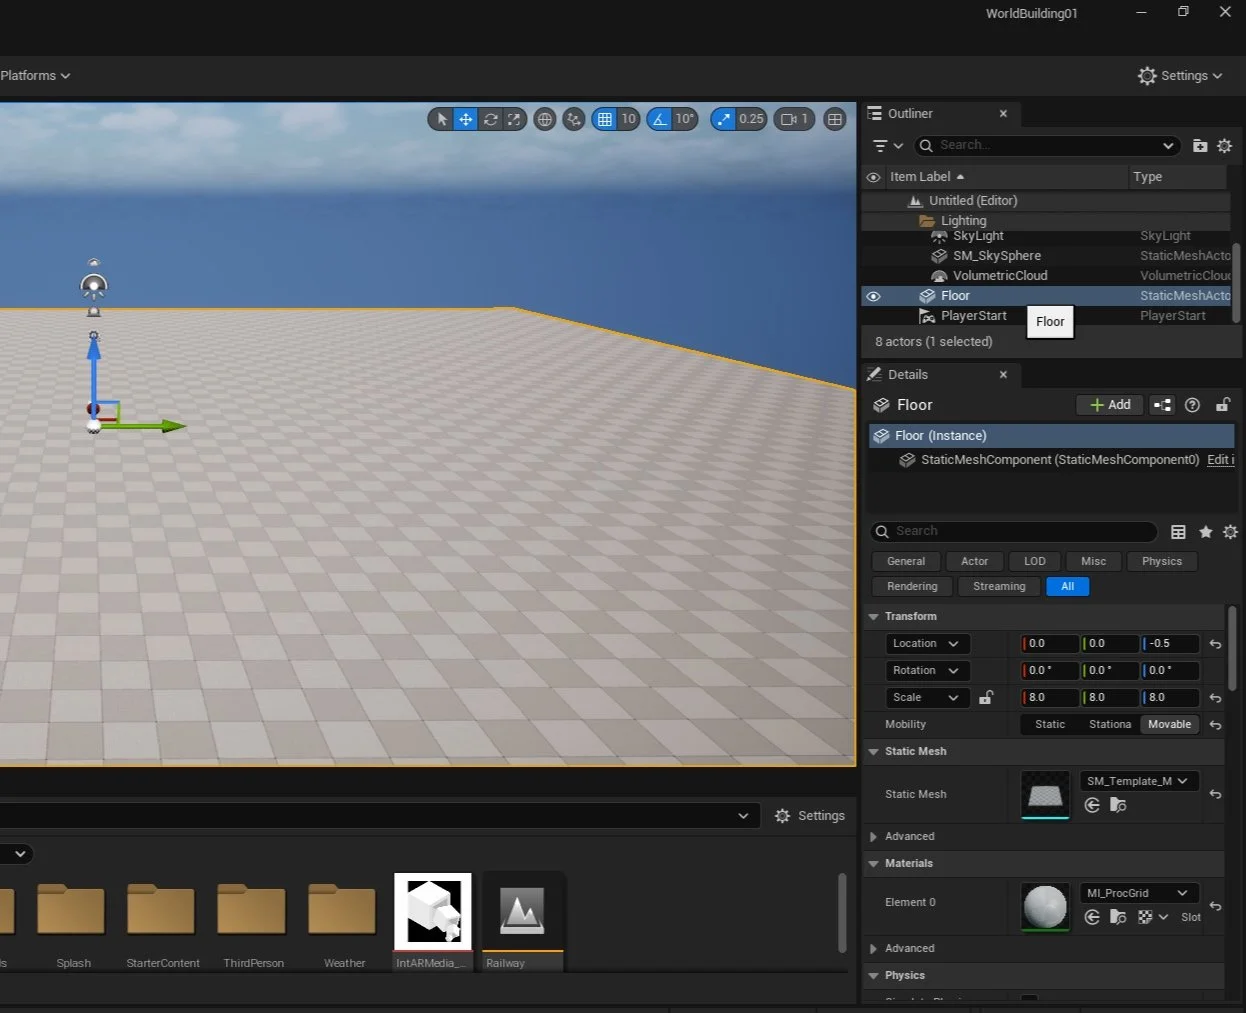
In the Outliner select the Floor asset and delete
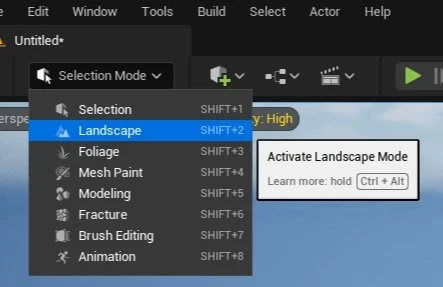
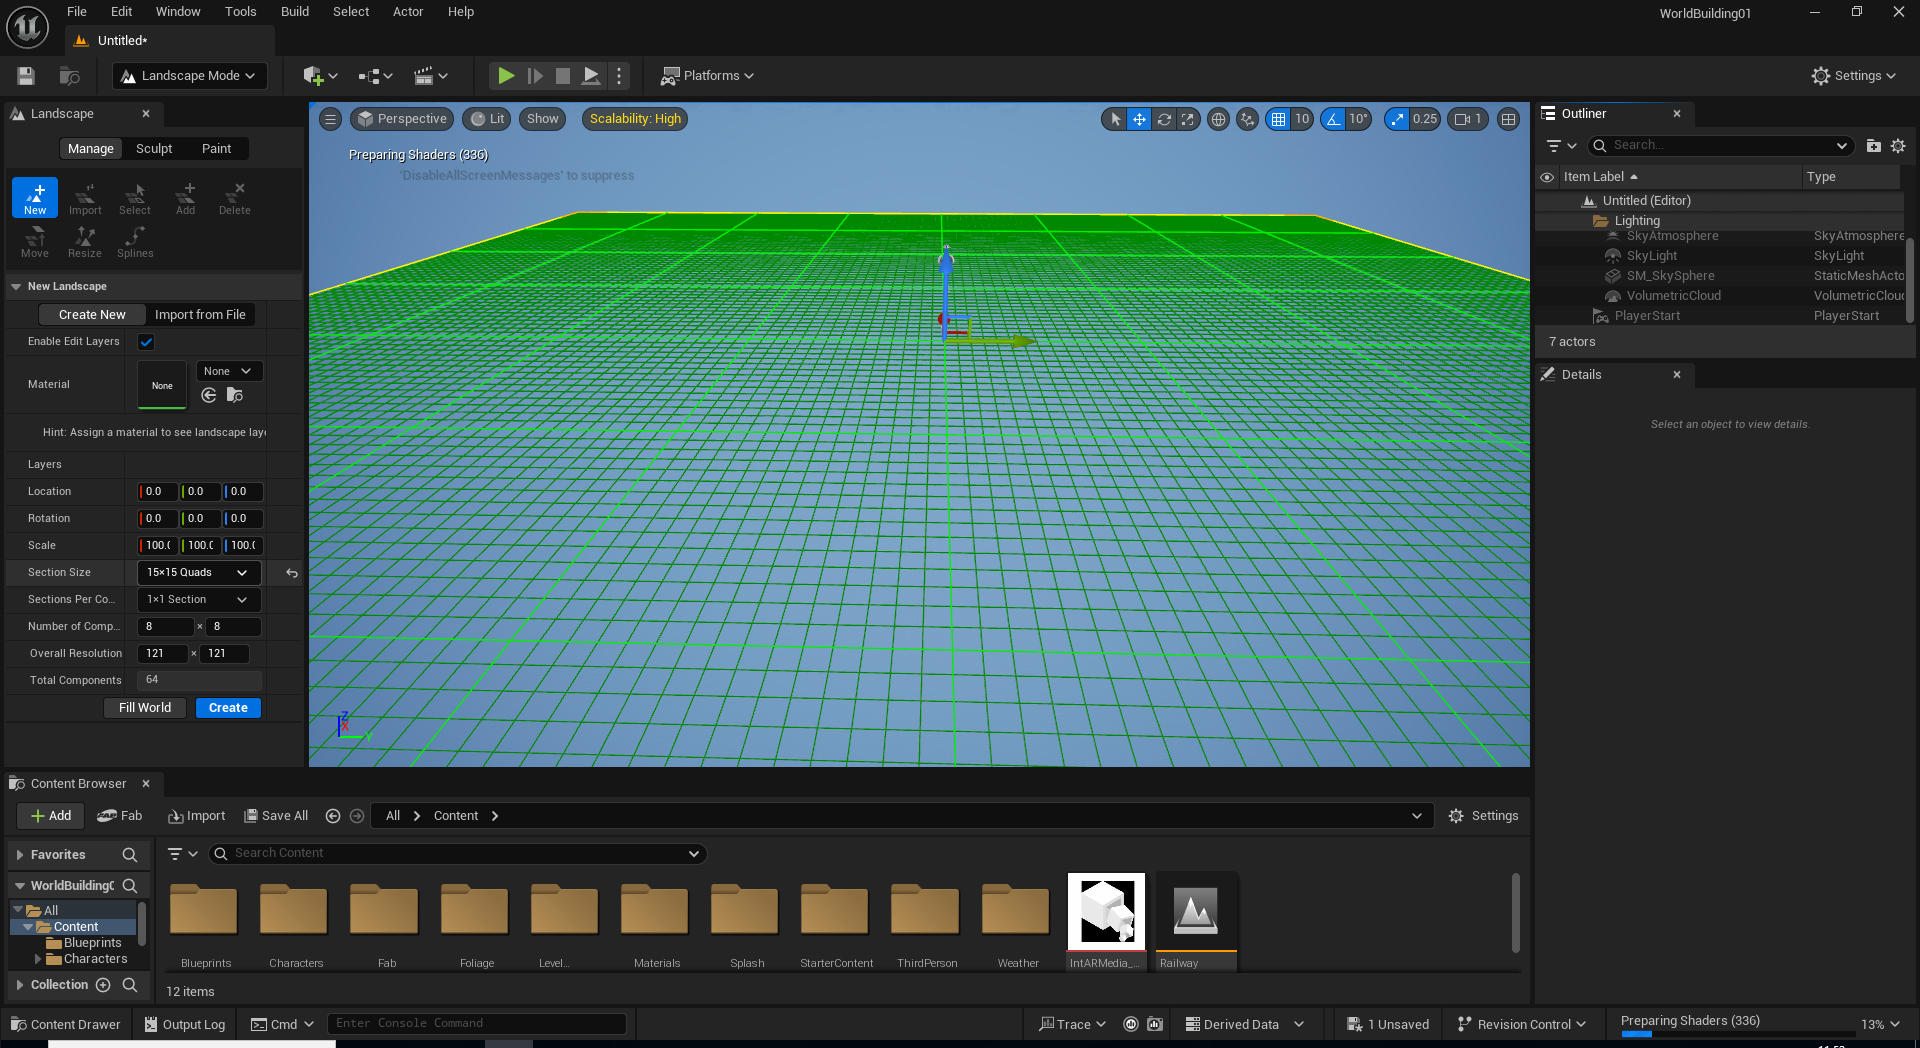
We are now going to change the editor mode to Landscape Mode [Shift+2]
This will bring up a green grid within the editor window, a landscape tool panel will also open.
We are going to change the Section size to 15x15 and then click Create
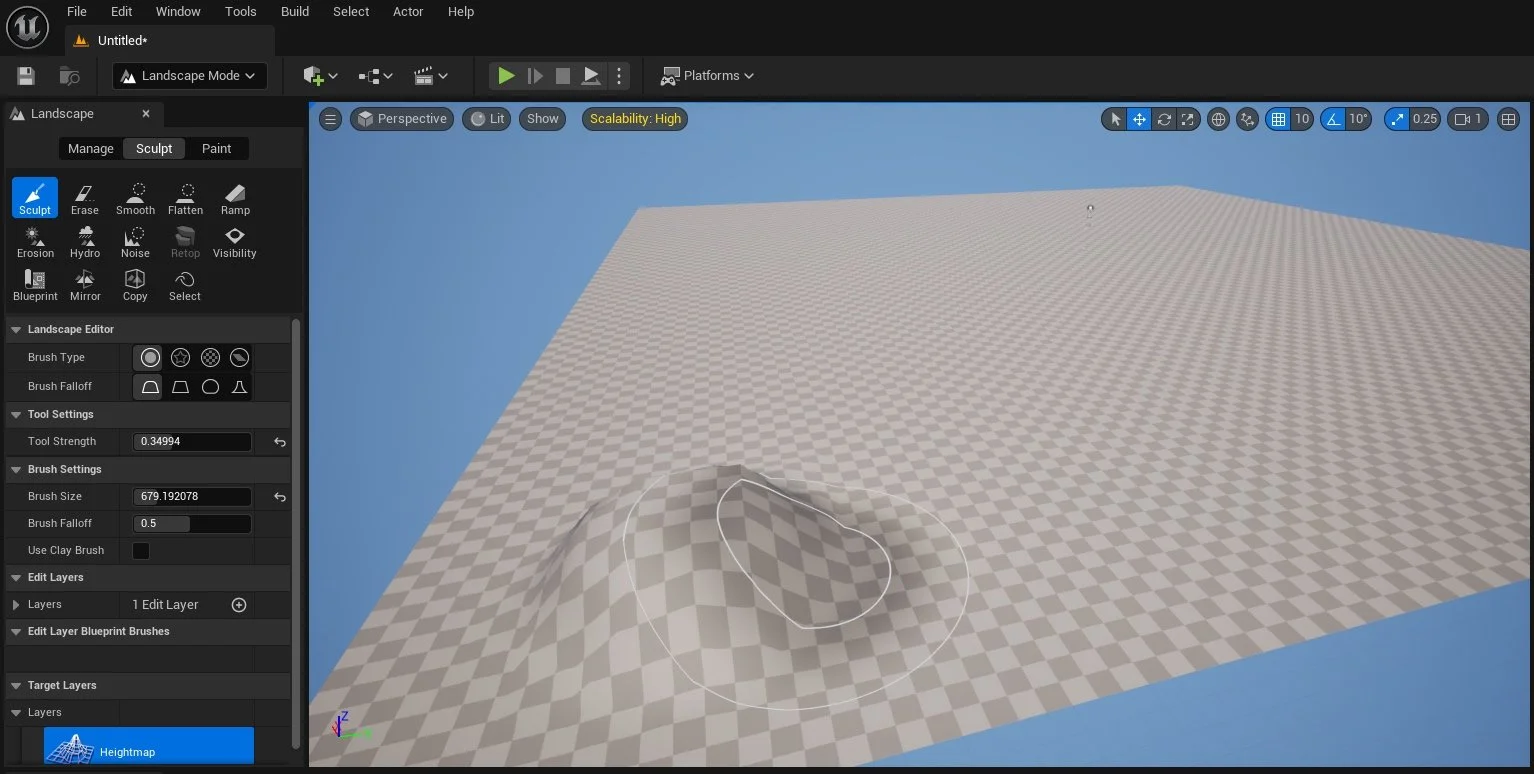
We will now start to Sculpt the landscape, we can do this via the sculpt brush and adjusting its size, intensity and falloff values. Holding shift whilst clicking or dragging on the landscape will carve into the landscape.
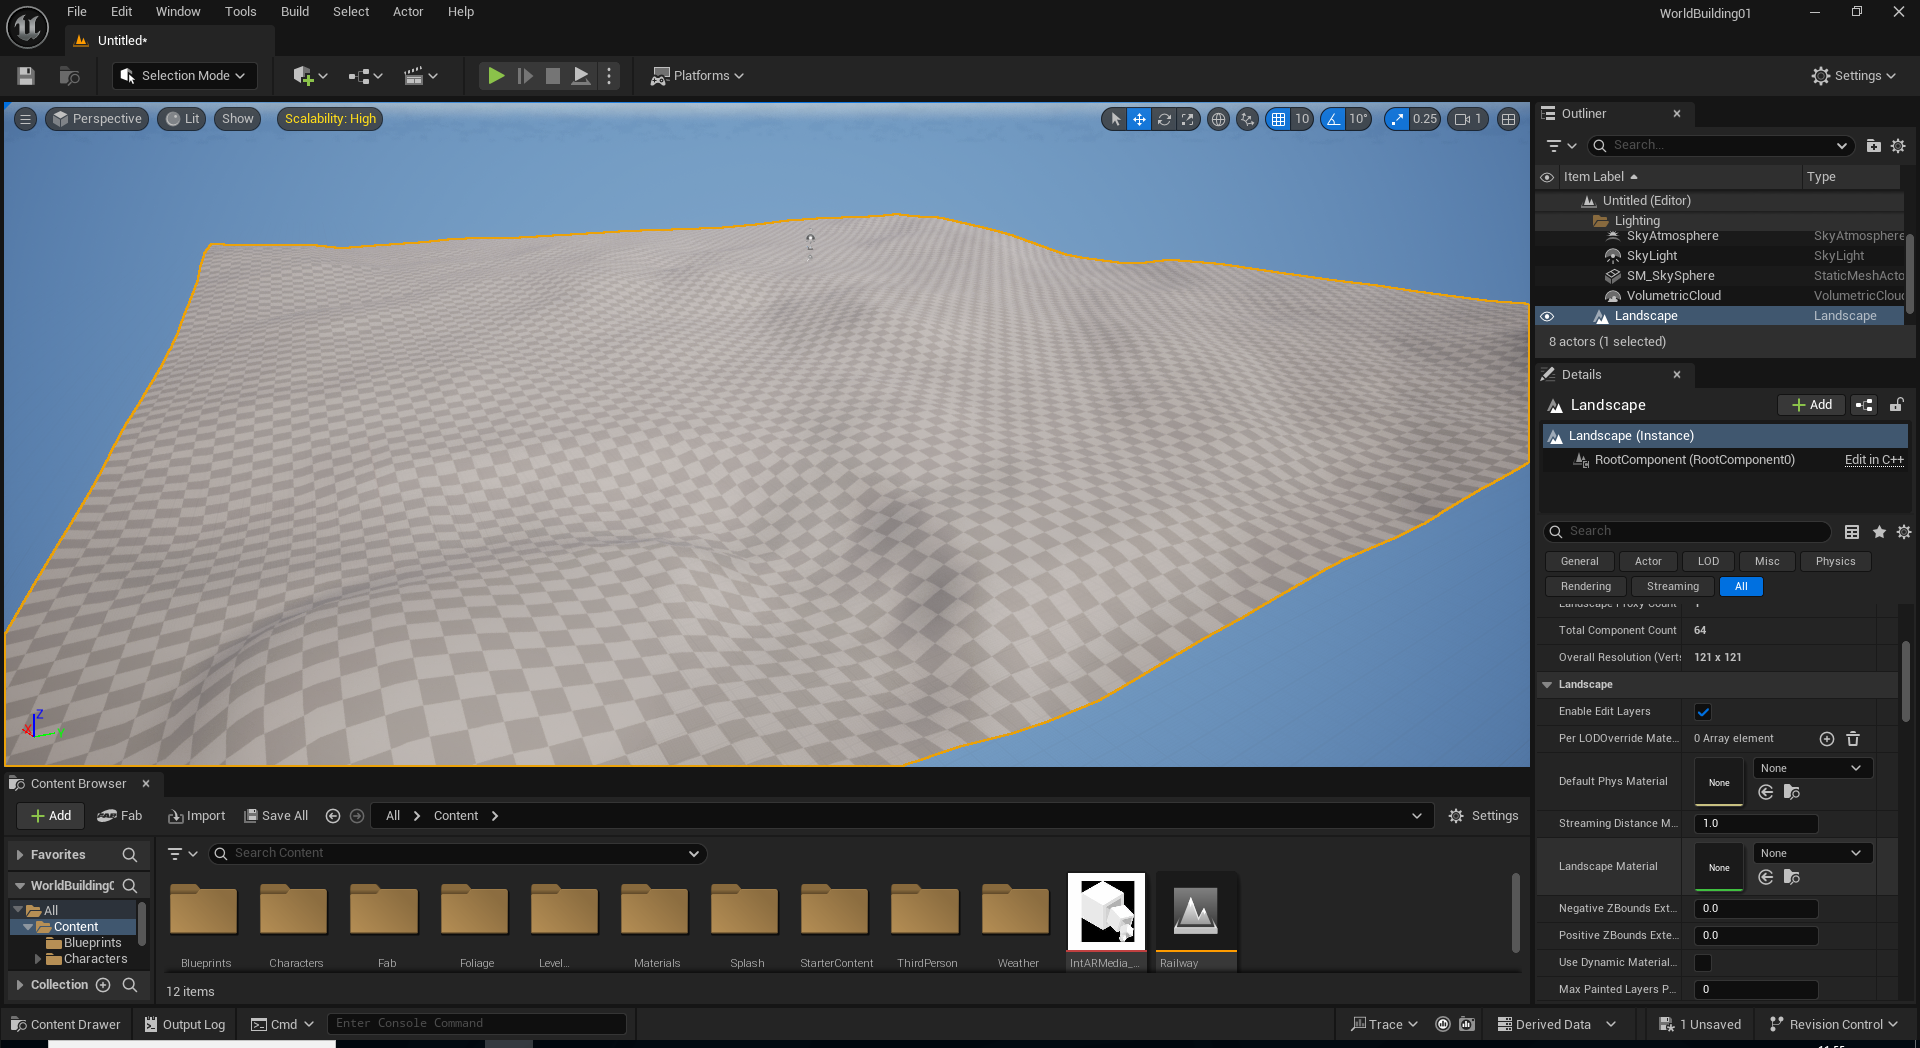
After we have shaped our landscape we will need to change the mode back to Selection Mode and select the landscape asset. You will notice it does not have a material applied under details panel yet so we will need to make one following these steps.
Creating Landscape Material (With Layer tags)
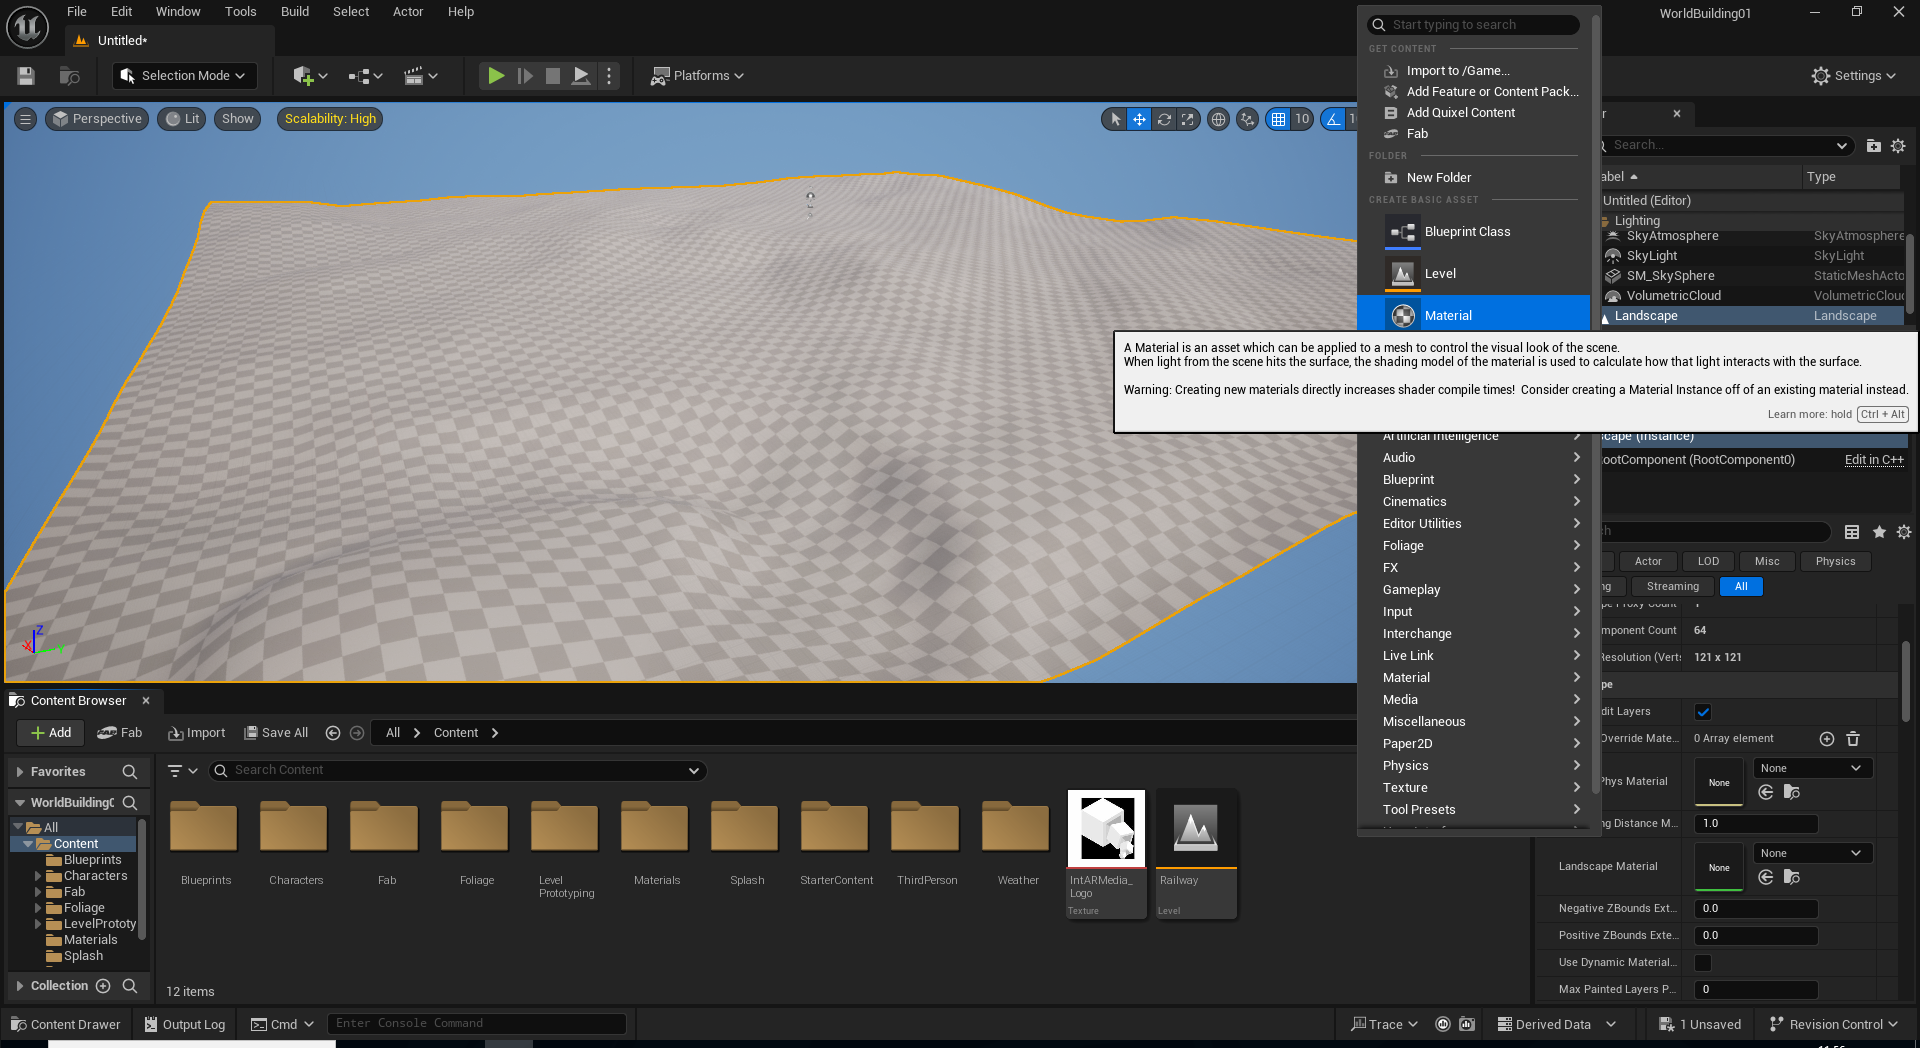

In our Content Browser we will be creating a landscape material, it is best practice to name this Mat_Landscape for example. Right click in content browser and select Material and rename this.
We will be modifying this material to build a material with a variety of layers that can be built upon and also control foliage spawns.
After Material is created double click on it to open material editor.
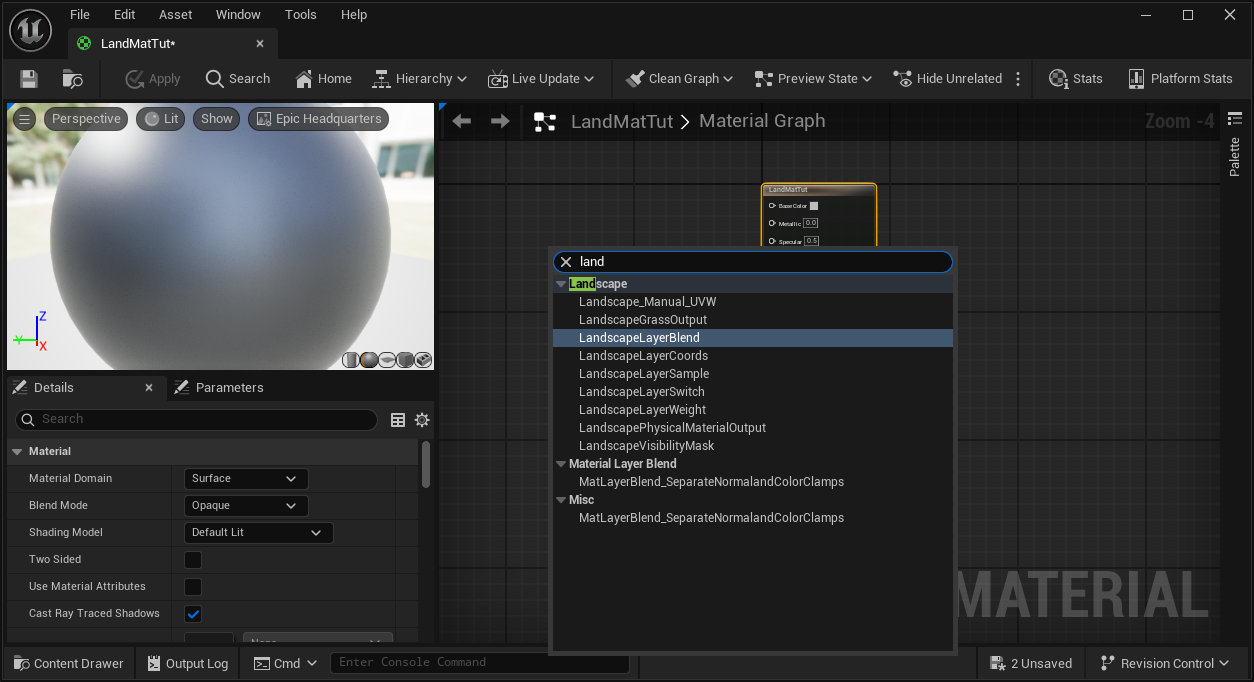
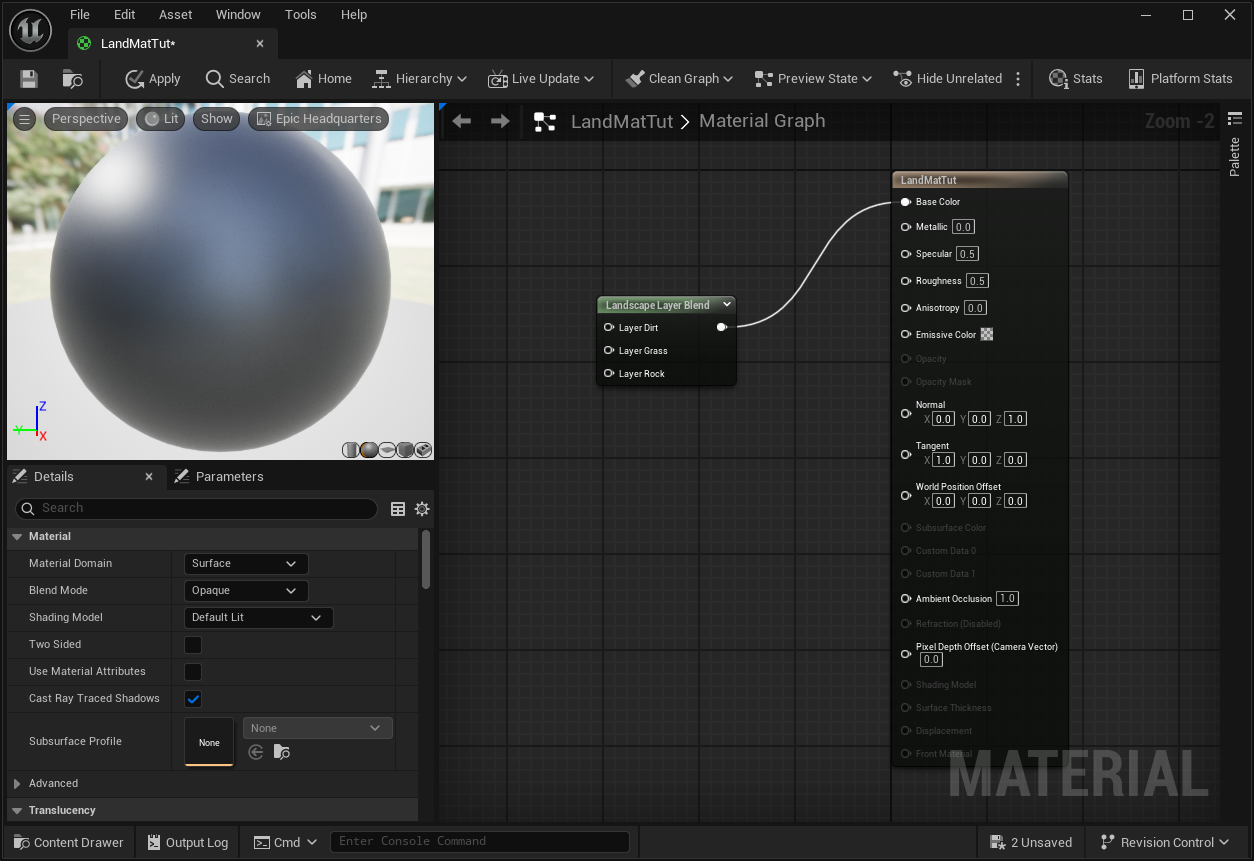
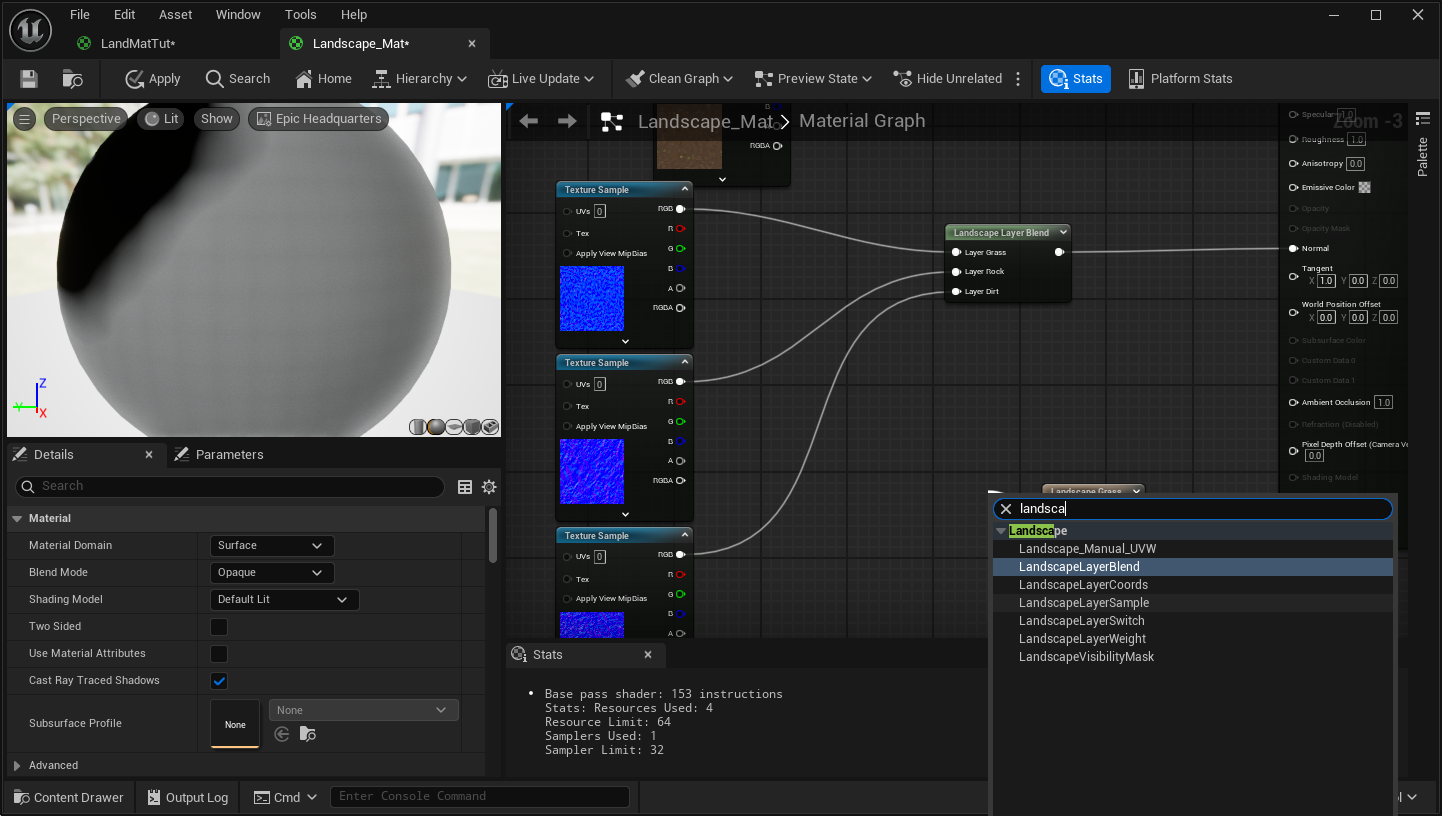
In the material editor Right click and type in LandscapeLayerBlend and left click on this name in the drop down menu to add it to our Texture graph. This will be where our layers will be specified.
Whilst we are in this window we should also adjust the Roughness value to 1.
With the LandscapeLayerBlend selected over in the details panel under layers we will need to Add Element using the little dropdown arrow we will rename these to what our texture layers will be and do this three times until we have 3 layers.
IT IS IMPORTANT THAT THESE LAYER NAMES REMAIN CONSISTENT THROUGHOUT
Example:
Dirt
Grass
Rock
Then drag the white output from the Layer Blend to the Input of the Base color this is done via left mouse clicking and dragging between the connection points.
If you make a mistake: To break a link right click on link and select break this Link
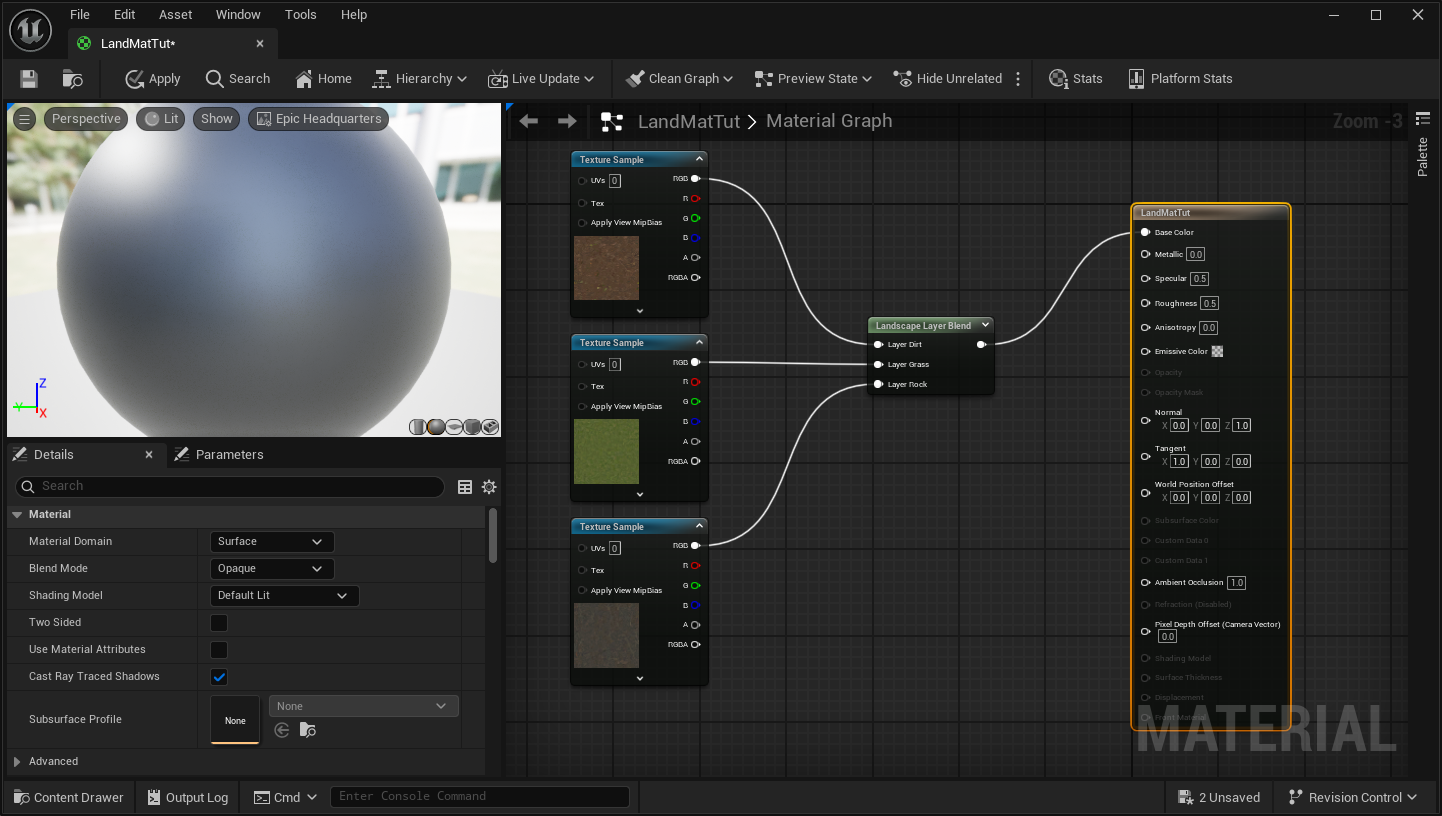
We will now link our textures to these layers, this is done via dragging the texture from our Content Browser into our Material editor Window.
We can have as many layers and textures as we want but we will need to reference each one used so it is useful to take notes of the layer names provided.
We can do this again for Normal map Textures also if we wanted to.
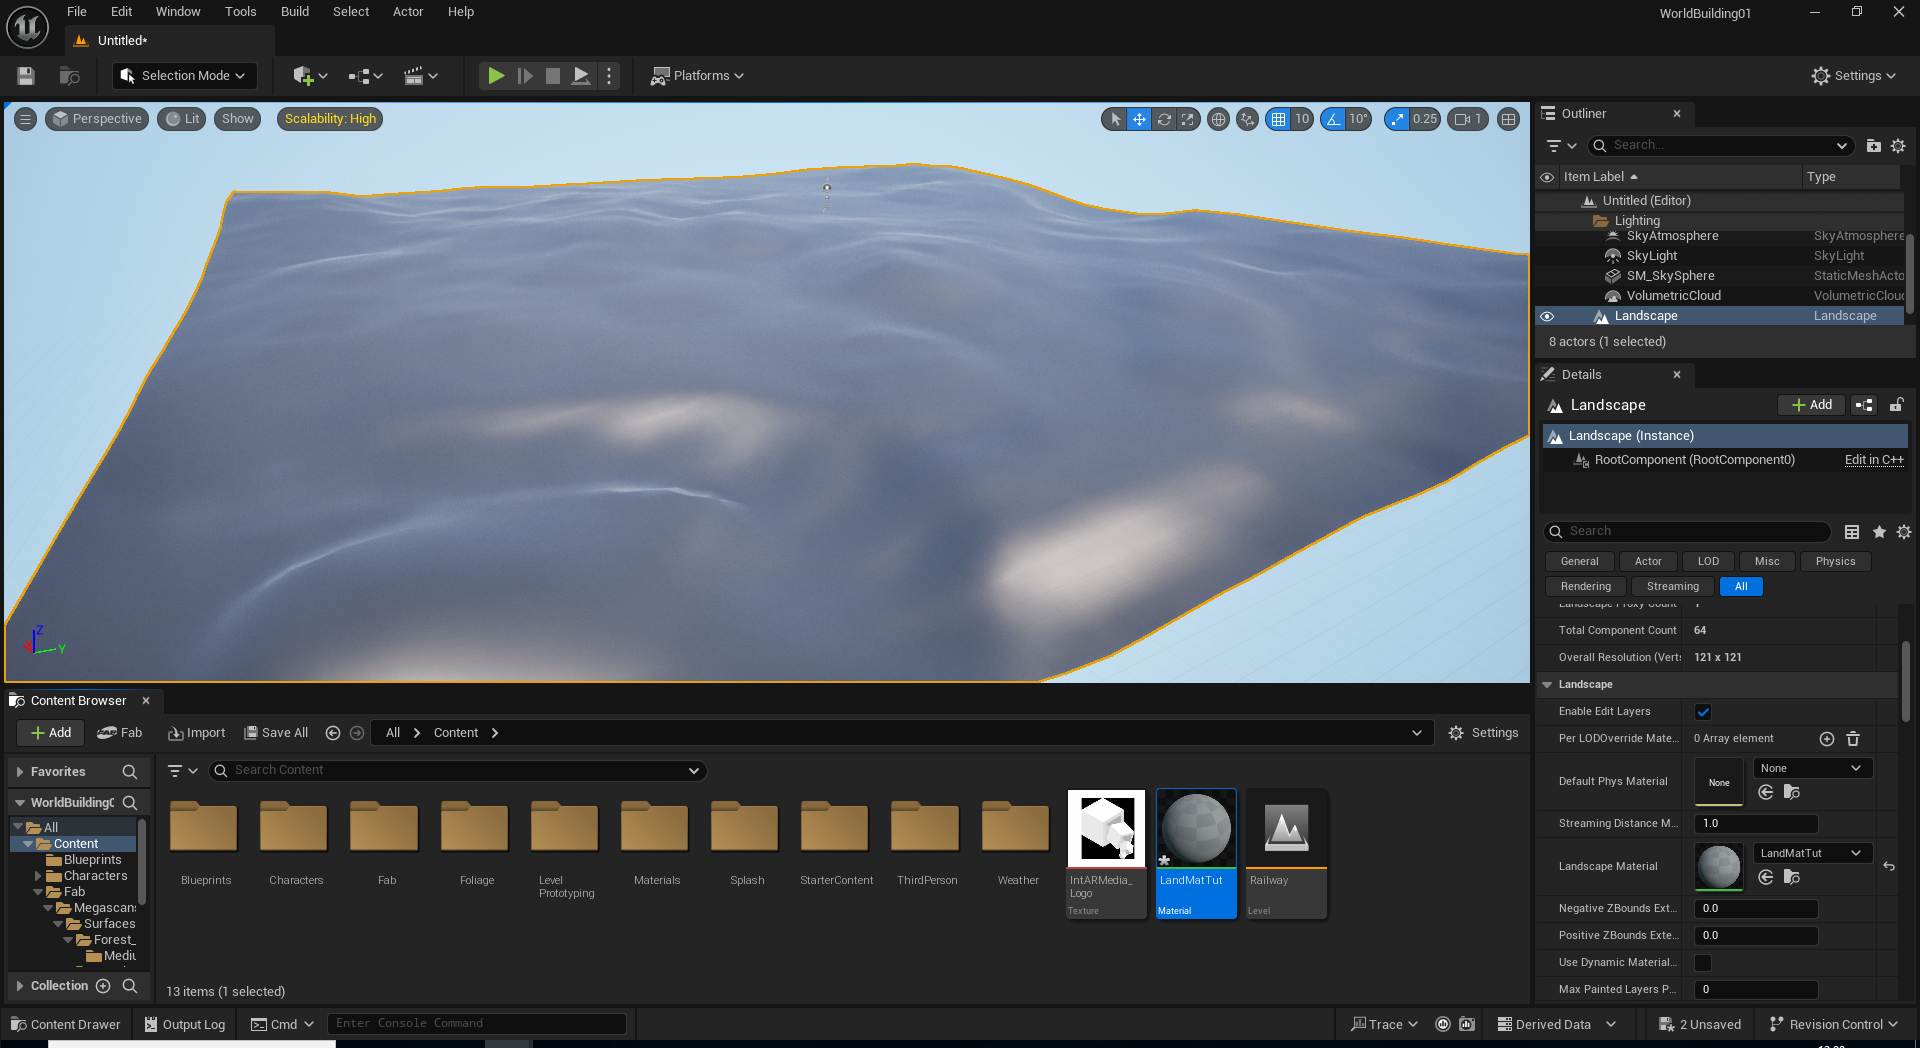
With our Landscape asset selected from our Outliner we are now going to apply this material to the Landscape Mesh, this is done via the details panel, Landscape > Landscape Material and selecting the Landscape Material you have created.
The Material will not look right yet, this is normal because these layers are not yet being referenced within the landscape paint application.
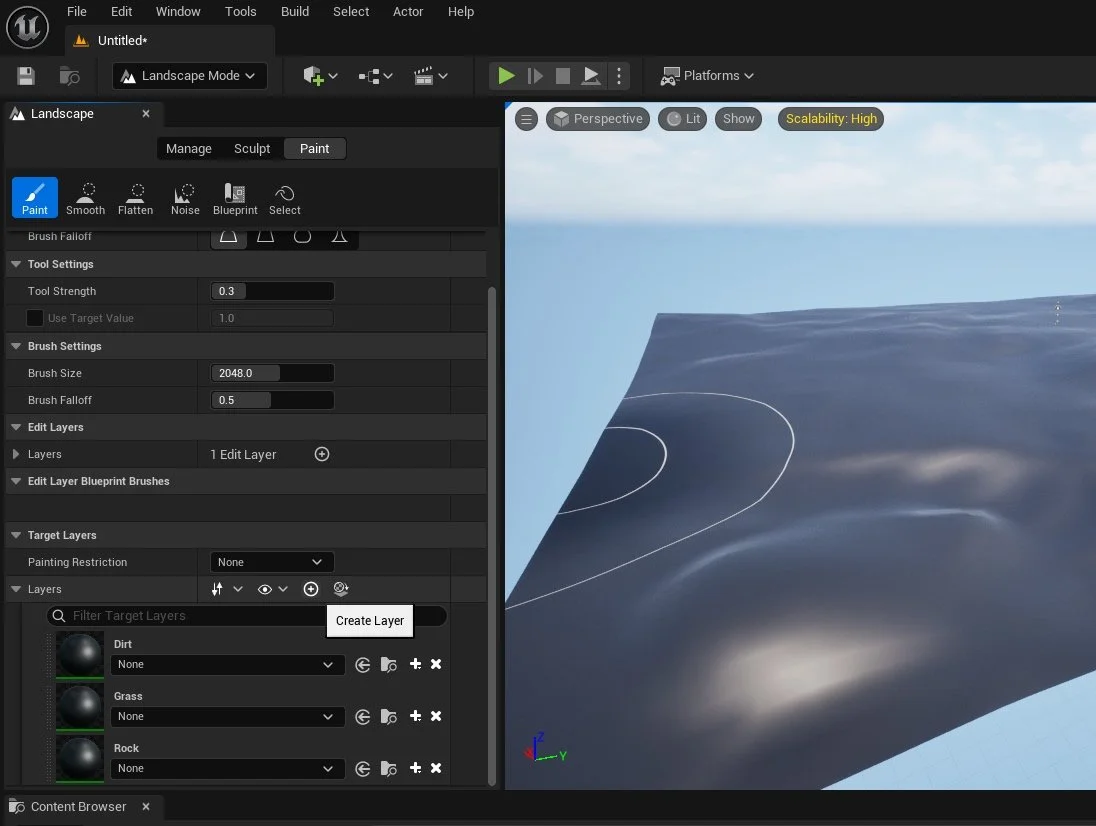
We now need to return to Landscape Mode and under the Landscape Tools panel go to the Paint option.
At the bottom there will be a Layers option which will be empty.
Click on the + Icon to Create a Layer and name this layer (by double clicking on the Layer name) to the same names used within our Landscape Material under Blend node.
Example:
Dirt
Grass
Rock
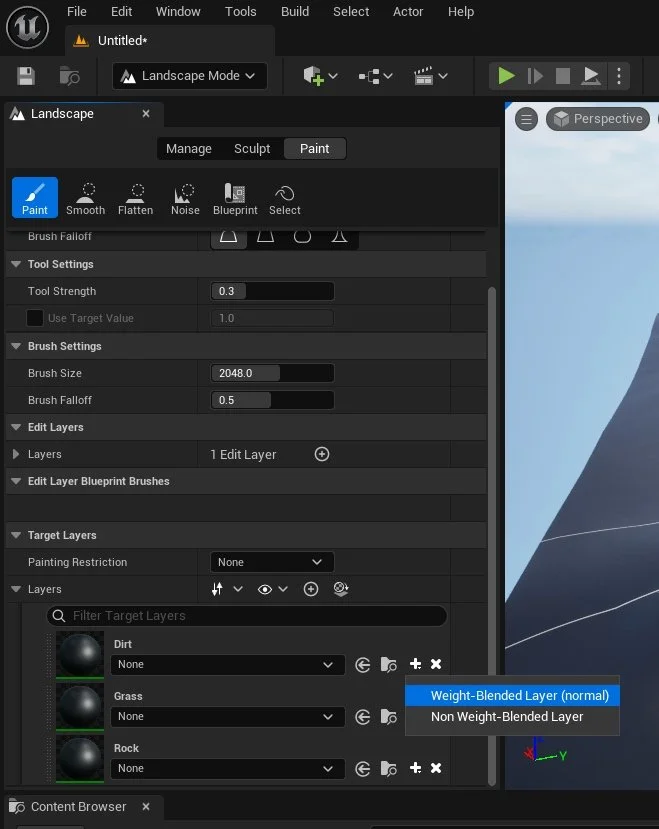
These Layers will still not work yet as we need to Apply Layer blending values.
To do this next to each of our newly created Layers select Weight-Based Layer (normal) and save this blend info file into Content Browser for each layer not changing its default name.
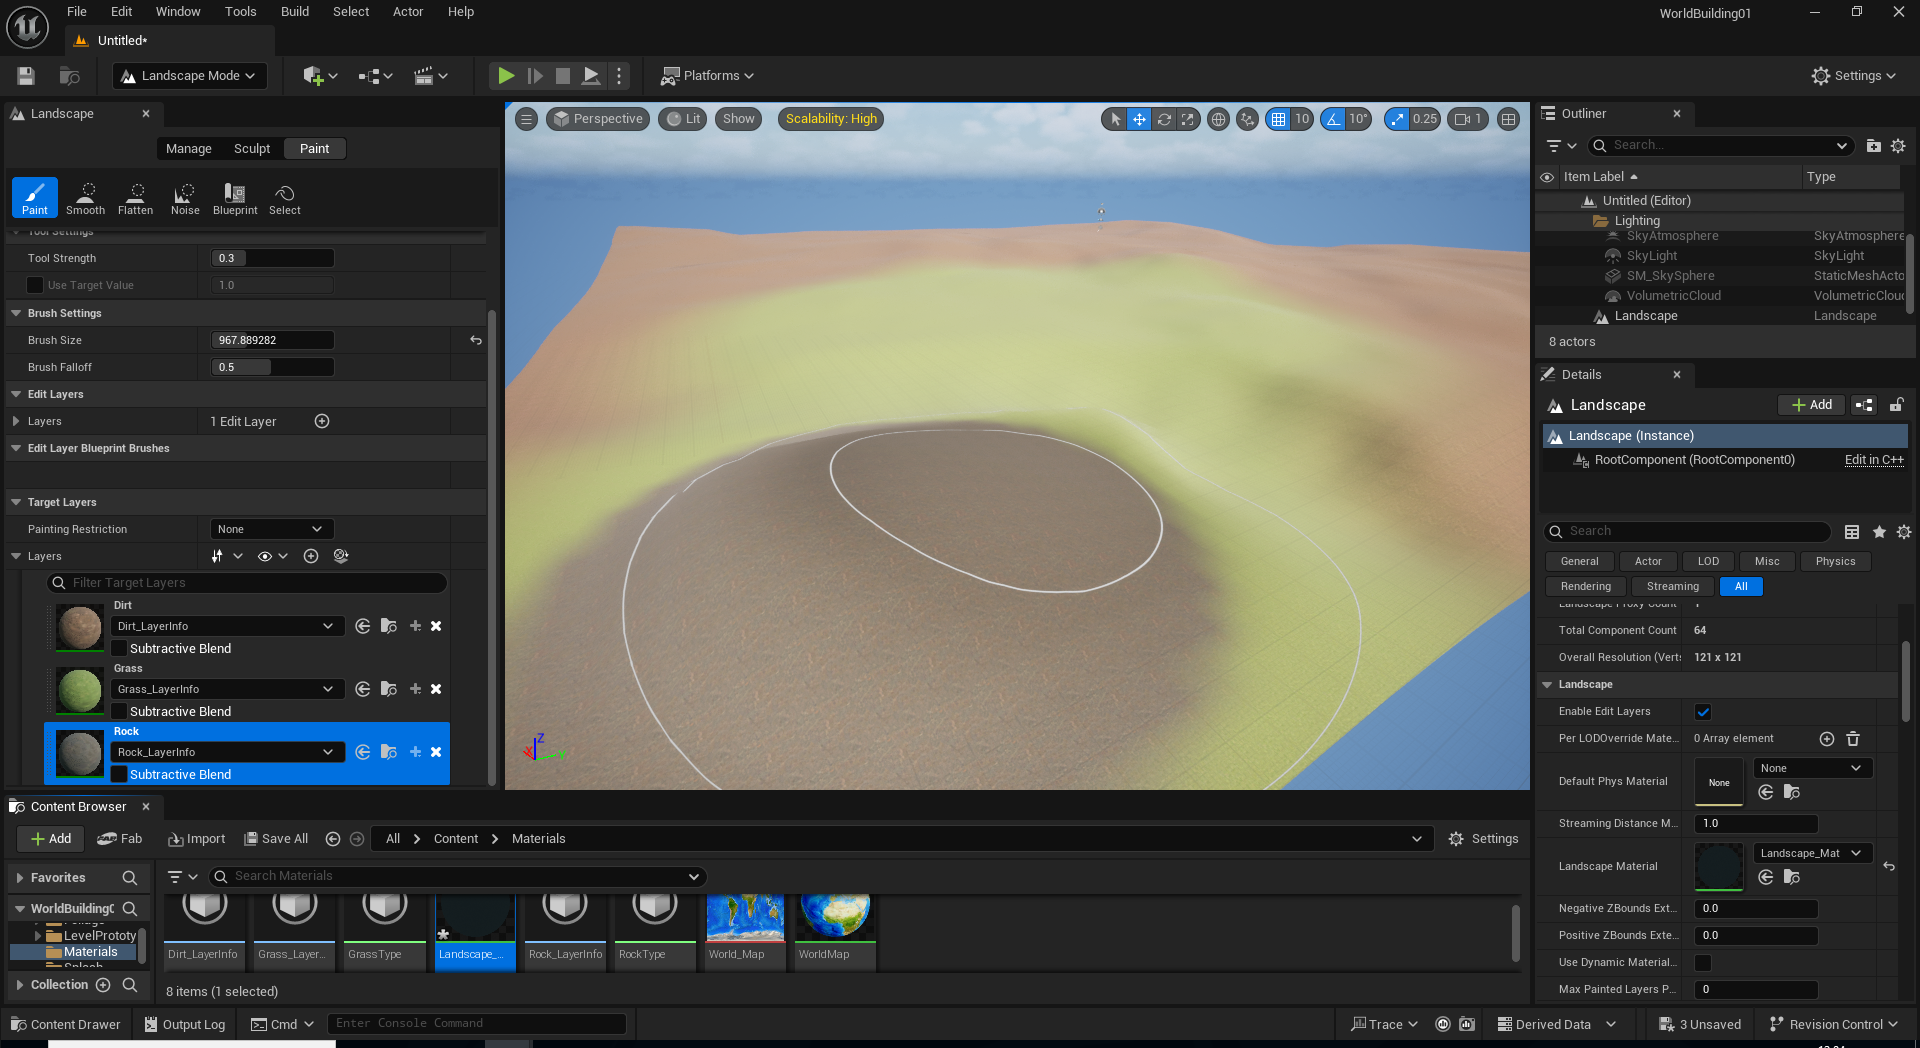
Once this is done you should see each layer material update to show the texture associated with it, the landscape will also start to update.
Layers work in similar vein to Photoshop with Layer at the top being the forefront layer.
To Paint textures onto our landscape select the layer then using the paint tool and brush settings to paint on the landscape.
Applying static meshes based on layer aka Adding Grass
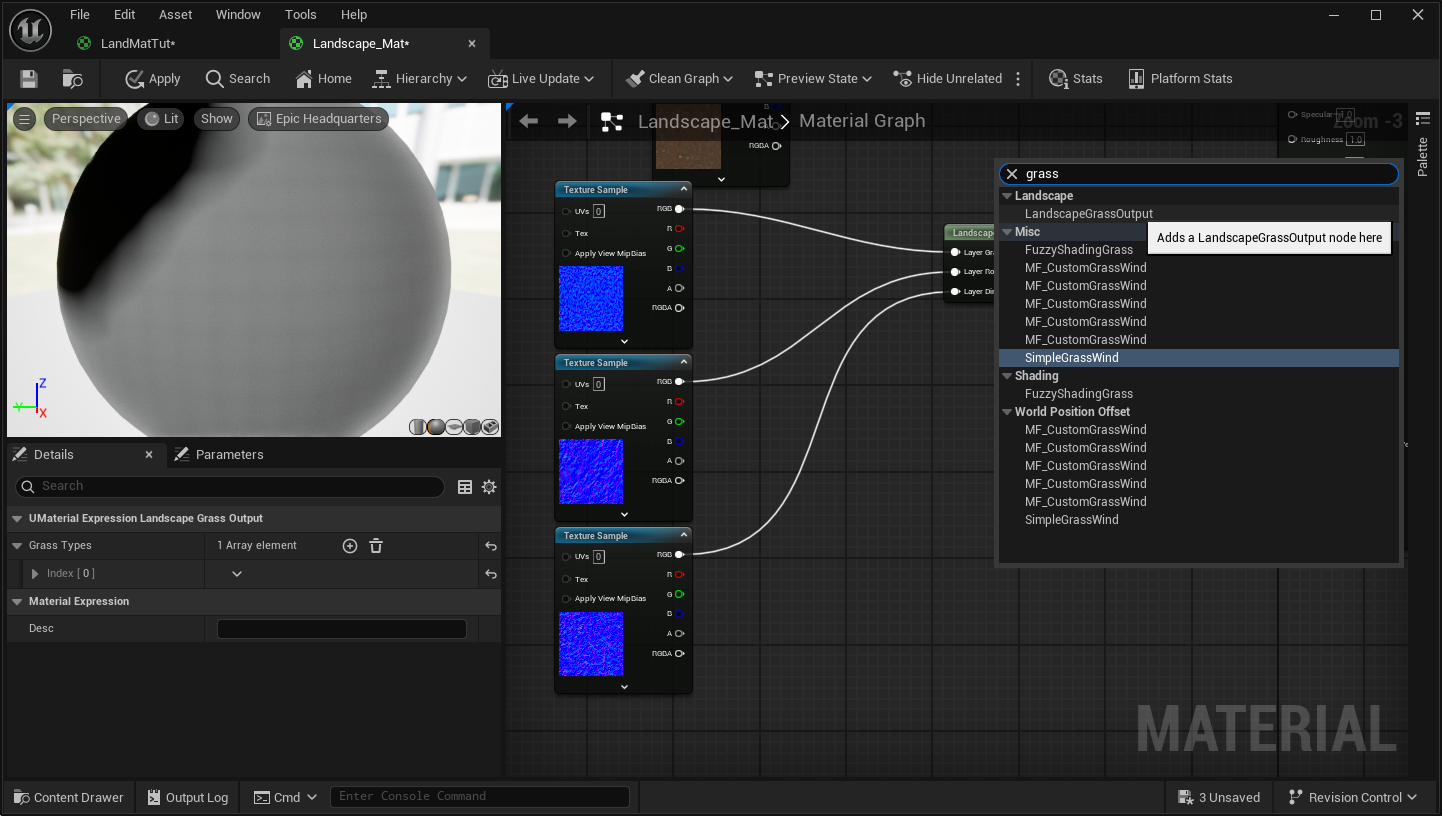
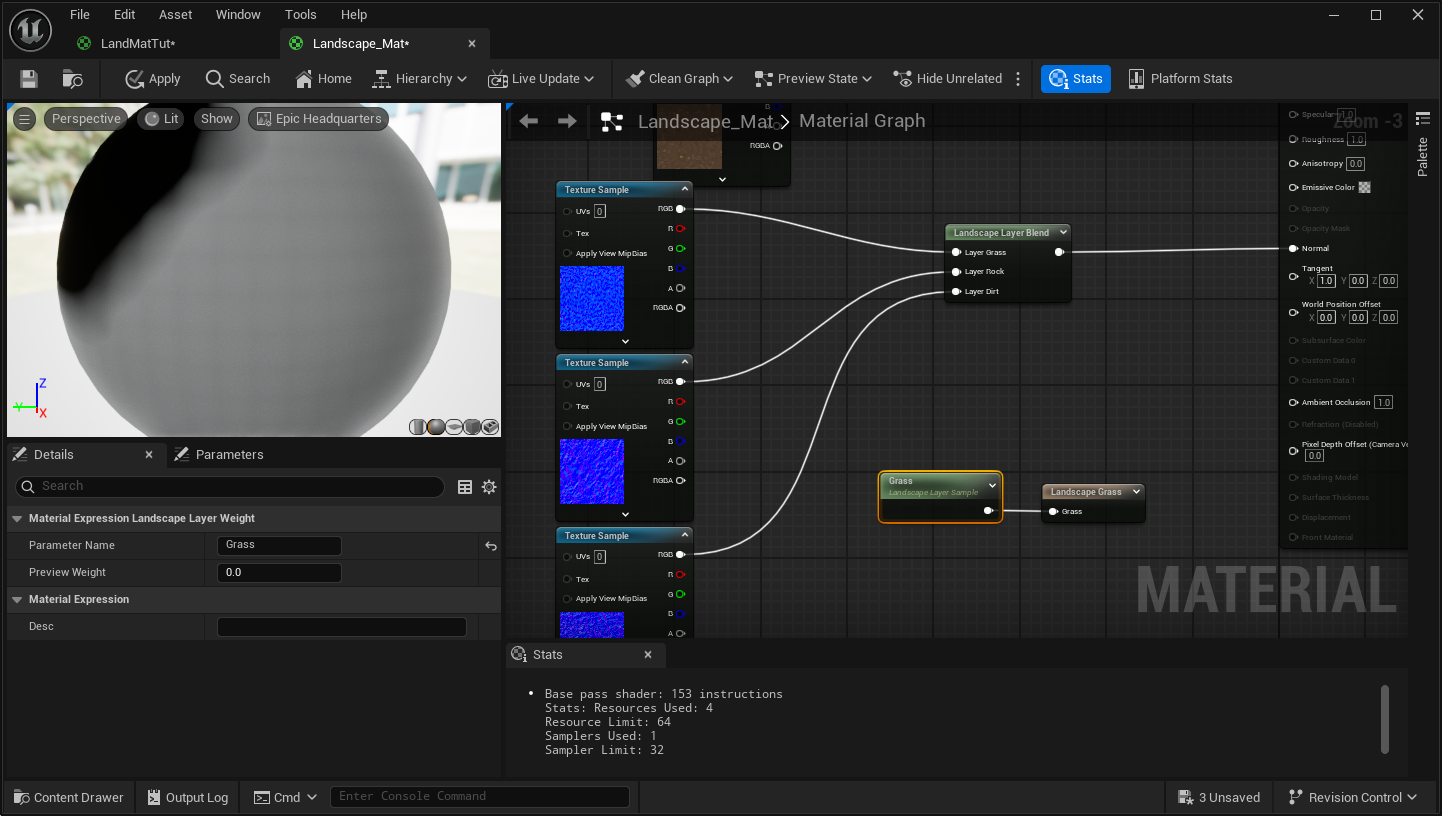
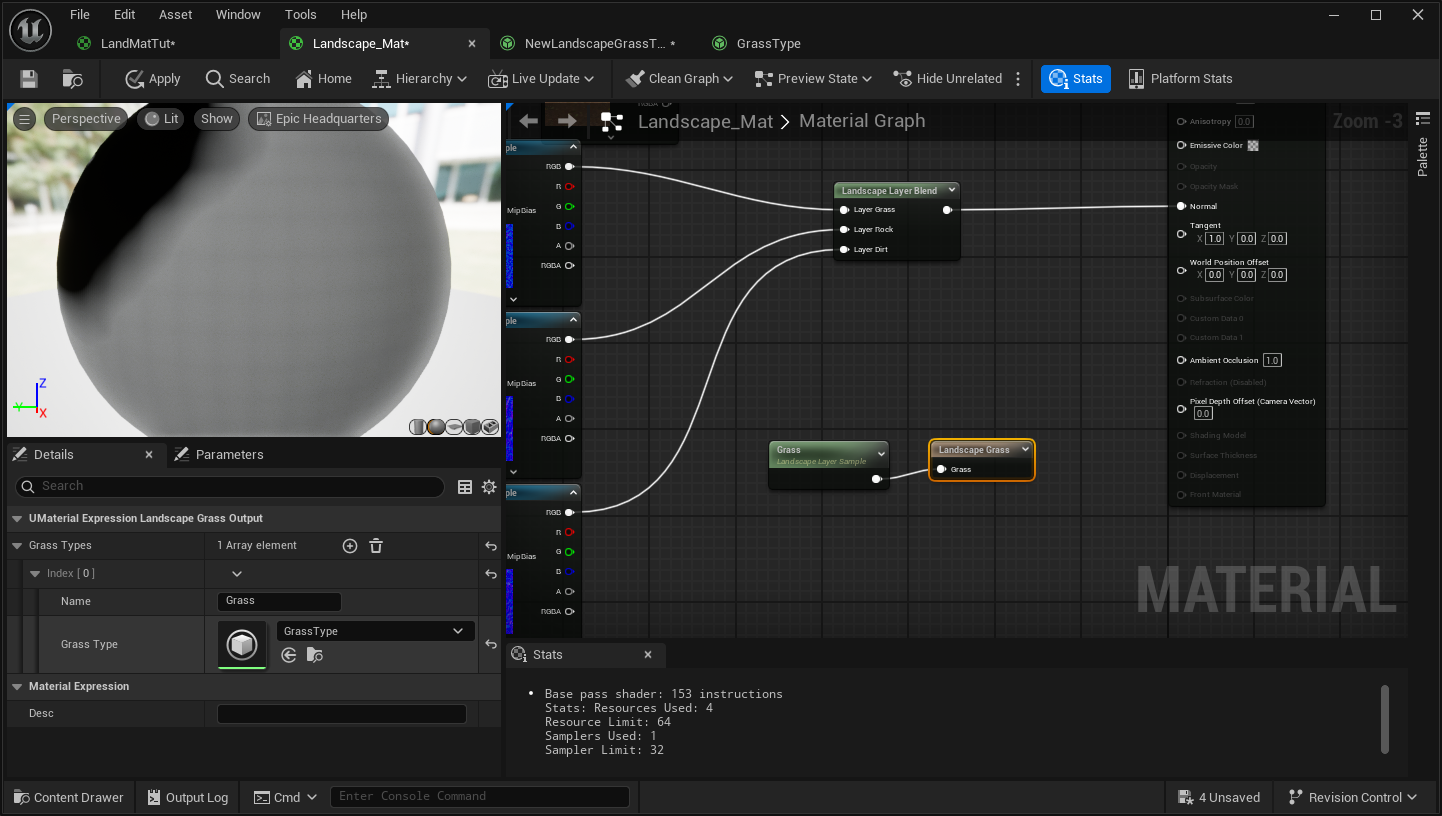
Double clicking our Landscape Material we are going to add a LandscapeGrassOutput Node to our Material Graph. Right click type in “grass'“ and add LandscapeGrassOutput.
Left Mouse click and drag from the input of the Landscape Grass Node and type in LandscapeLayerSample and add to Material Graph.
Rename LandscapeLayerSample Node to Grass this will reference back to the Layer Name we created earlier.
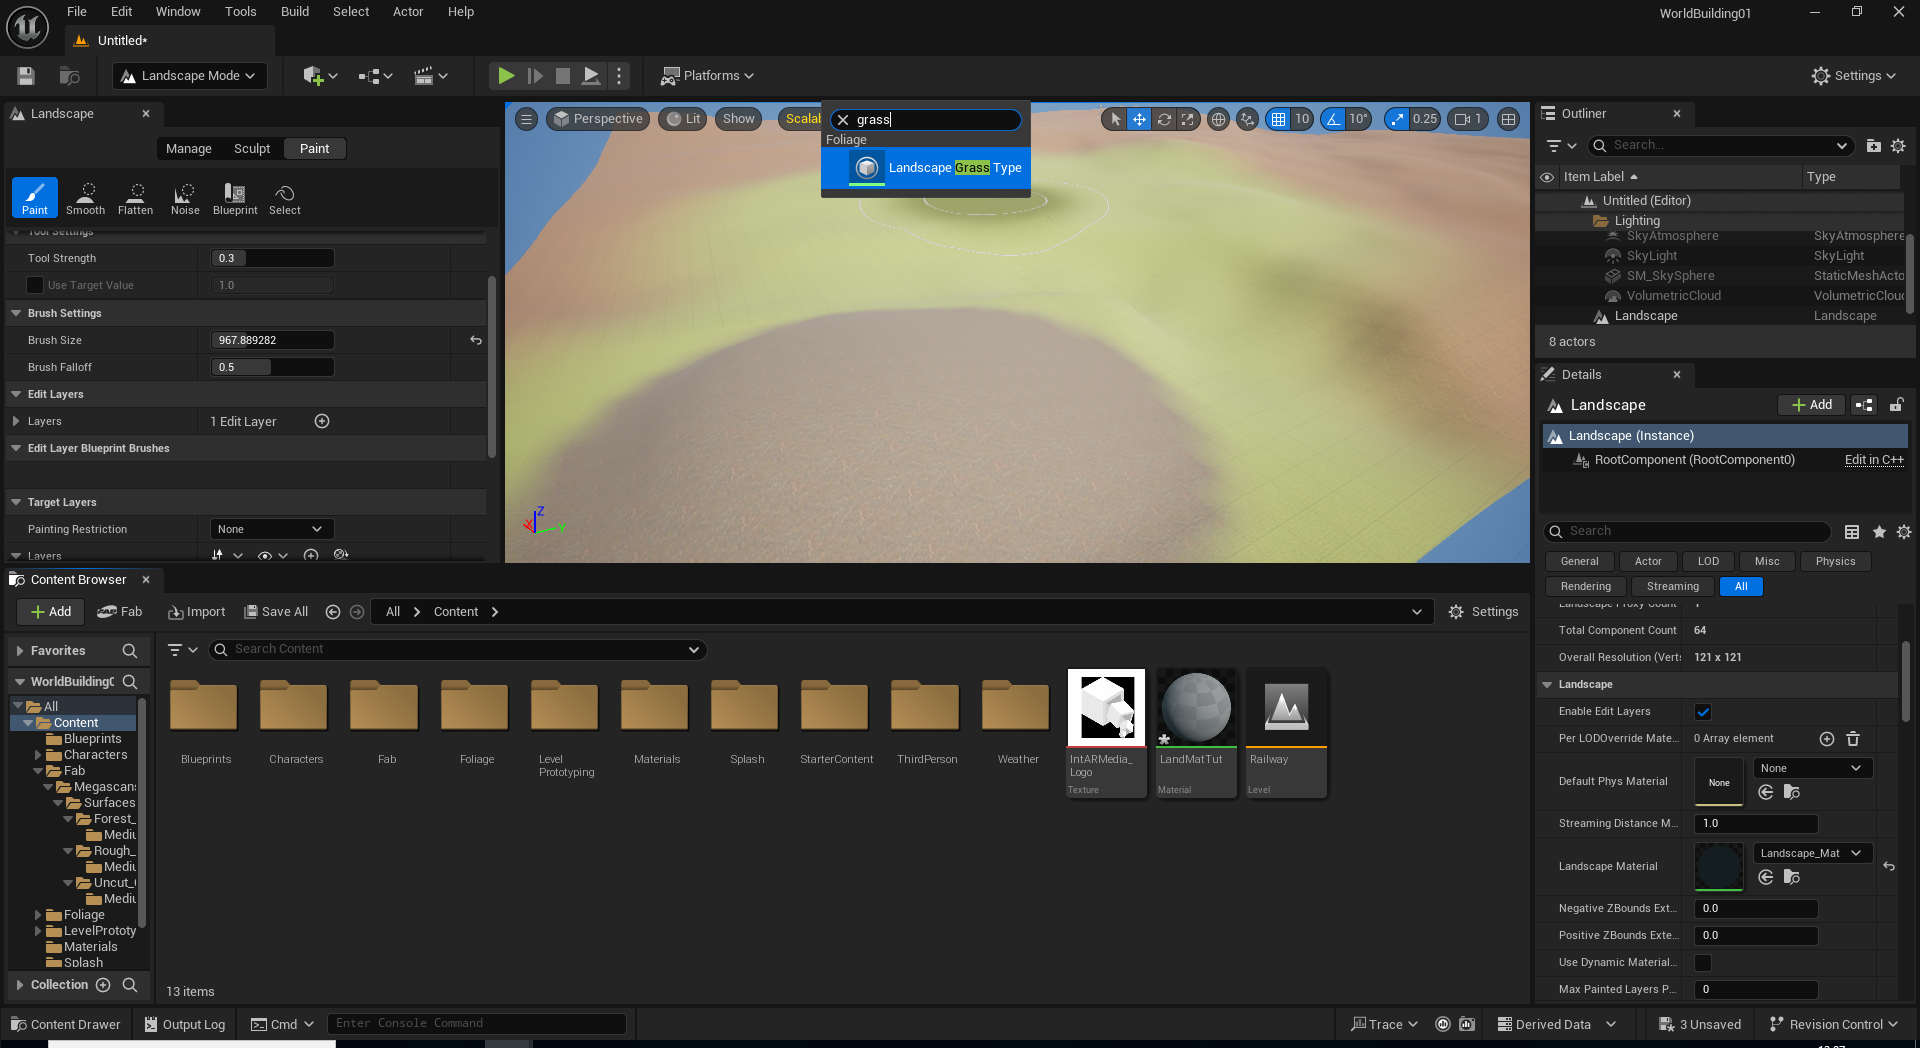
Minimise the Landscape Material window for now we will be returning to it. In Content Browser Right Click and type in Grass and we will be creating a Landscape grass Type, rename this to Grass.
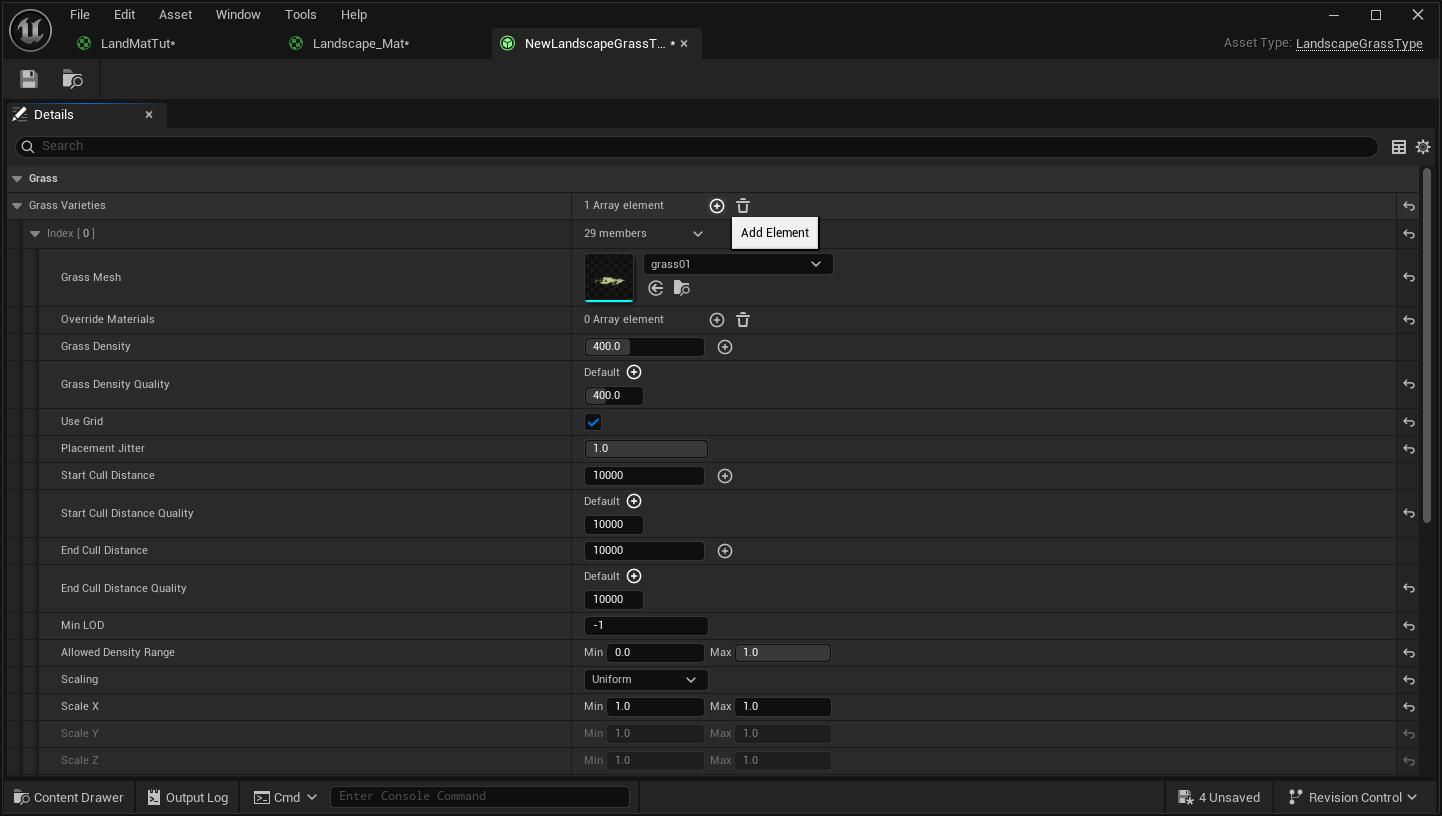
Double Click on the GrassType just created this will open a window. Here we will be adding our foliage static meshes to be automatically applied to our Grass Layer. Click on the + next to Grass Varieties and then the drop down arrow next to Index [0], We will now change the Grass Mesh to one in our Content Browser (some examples are provided within foliage folder, these can also be found via drop down menu in Grass Mesh area.
Adjusting the density and the values here will affect the density of the meshes added, to add variety create and select multiple Grass Varieties [Indexes] by repeating the above steps within this same GrassType asset.
Returning to our Landscape Material select the Landscape Grass Node and under details Select our Grass Type to be the one we just made above. Hit Apply and Save.
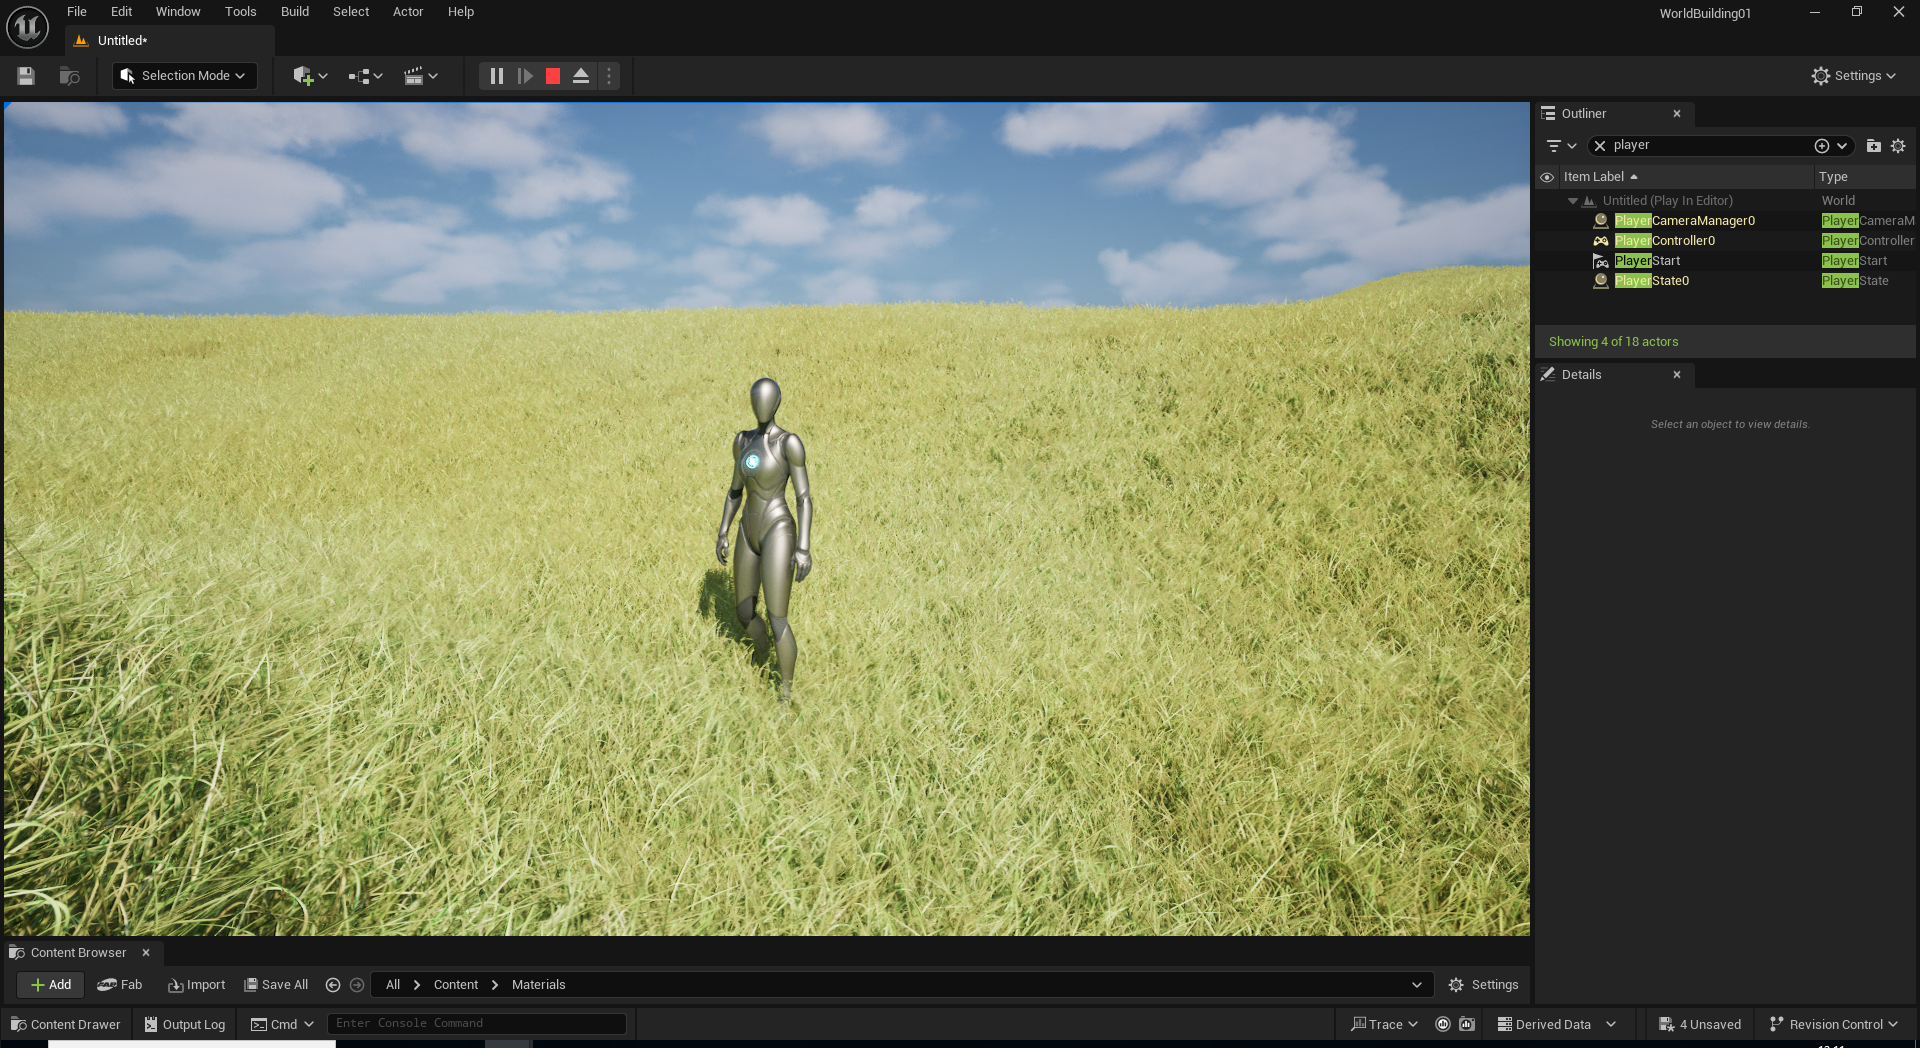
If all the above steps have been followed you should now start to see these Grass static meshes appearing on all areas of our Landscape mesh painted with the Grass Layer brush.
Tip: This also works with meshes that are not grass meshes and could be used for rocks for example however meshes added this way do not have collision applied so bare this in mind and also project should have Nanite turned on. This is now on by default in versions 5.5 onwards.